DIY Halloween Bowl: Pottery Barn-Inspired Dollar Tree Decor
Looking for a Halloween craft that looks high-end but costs less than ten bucks? This DIY Halloween bowl is the perfect Pottery Barn “dupe” (this is a LOOSE term for this project, more inspired than dupe) for spooky season. Pottery Barn sells a version of this skeleton candy bowl for over $100 (even on clearance)! Luckily, you can create your own with a quick trip to Dollar Tree and a few supplies you probably already have at home.
Whether you’re hosting a Halloween party or just want a unique candy dish by your front door, this project is a great way to bring a spooky yet classy vibe to your home.
Check out more of my Halloween Projects here!

Materials You’ll Need
*this blog post contains affiliate links, read my full privacy policy here.
- Plastic skeleton (Dollar Tree)
- Plastic bowl or bin (Dollar Tree) – they don’t have the one I used online but honestly some of these look better and I am jealous.
- Hot glue gun and glue sticks
- Pair of scissors
- Spray paint, I used Rustoleum Chrome – I said Krylon in the YT Video!! I apologize!
- Optional: sandpaper for smoothing rough edges
- Optional: metallic black acrylic paint for shading and details
Step 1: Prep Your Skeleton

Start with your Dollar Tree skeleton. These usually have a small hook on top since they’re meant for hanging. Use a pair of scissors to snip the hook off. If any rough edges remain, lightly sand them down with sandpaper.

This step is optional but helps your DIY decor project look more polished in the end.
Step 2: Attach the Skeleton

Place the skeleton so that any writing or logos are on the back side, once painted, they’ll be hidden.

Time to grab that trusty hot glue gun. Position the skeleton against the side of your bowl so it looks like it’s holding on for dear life. Press the chest firmly against the back of the bowl and add hot glue at contact points like the chest and under the chin to keep it steady.

The arms can be tricky since Dollar Tree skeletons don’t bend smoothly. Add hot glue to the forearms and hands, holding them in place until the glue sets. Patience is key here, don’t rush or your skeleton might peel off.
Step 3: Work on the Legs

Next, carefully remove the lower part of the skeleton’s legs at the knees. Cut off the little plastic “nubs” so they’ll lay flat. Position the femur bones so they splay outward.

Then attach the “tibia” or lower leg bone inward as if the skeleton is doing the butterfly pose.

Use hot glue again to secure each piece separately. Make sure the feet don’t overlap, or your large bowl will wobble once it’s finished.

Step 4: Spray Paint the DIY Halloween Bowl
Take your project outside or into a well-ventilated space. Spray the entire piece with a metallic silver paint (Krylon or Rust-Oleum both work great). One solid coat usually covers everything, but you can flip it over and spray the underside to make sure no spots are missed.
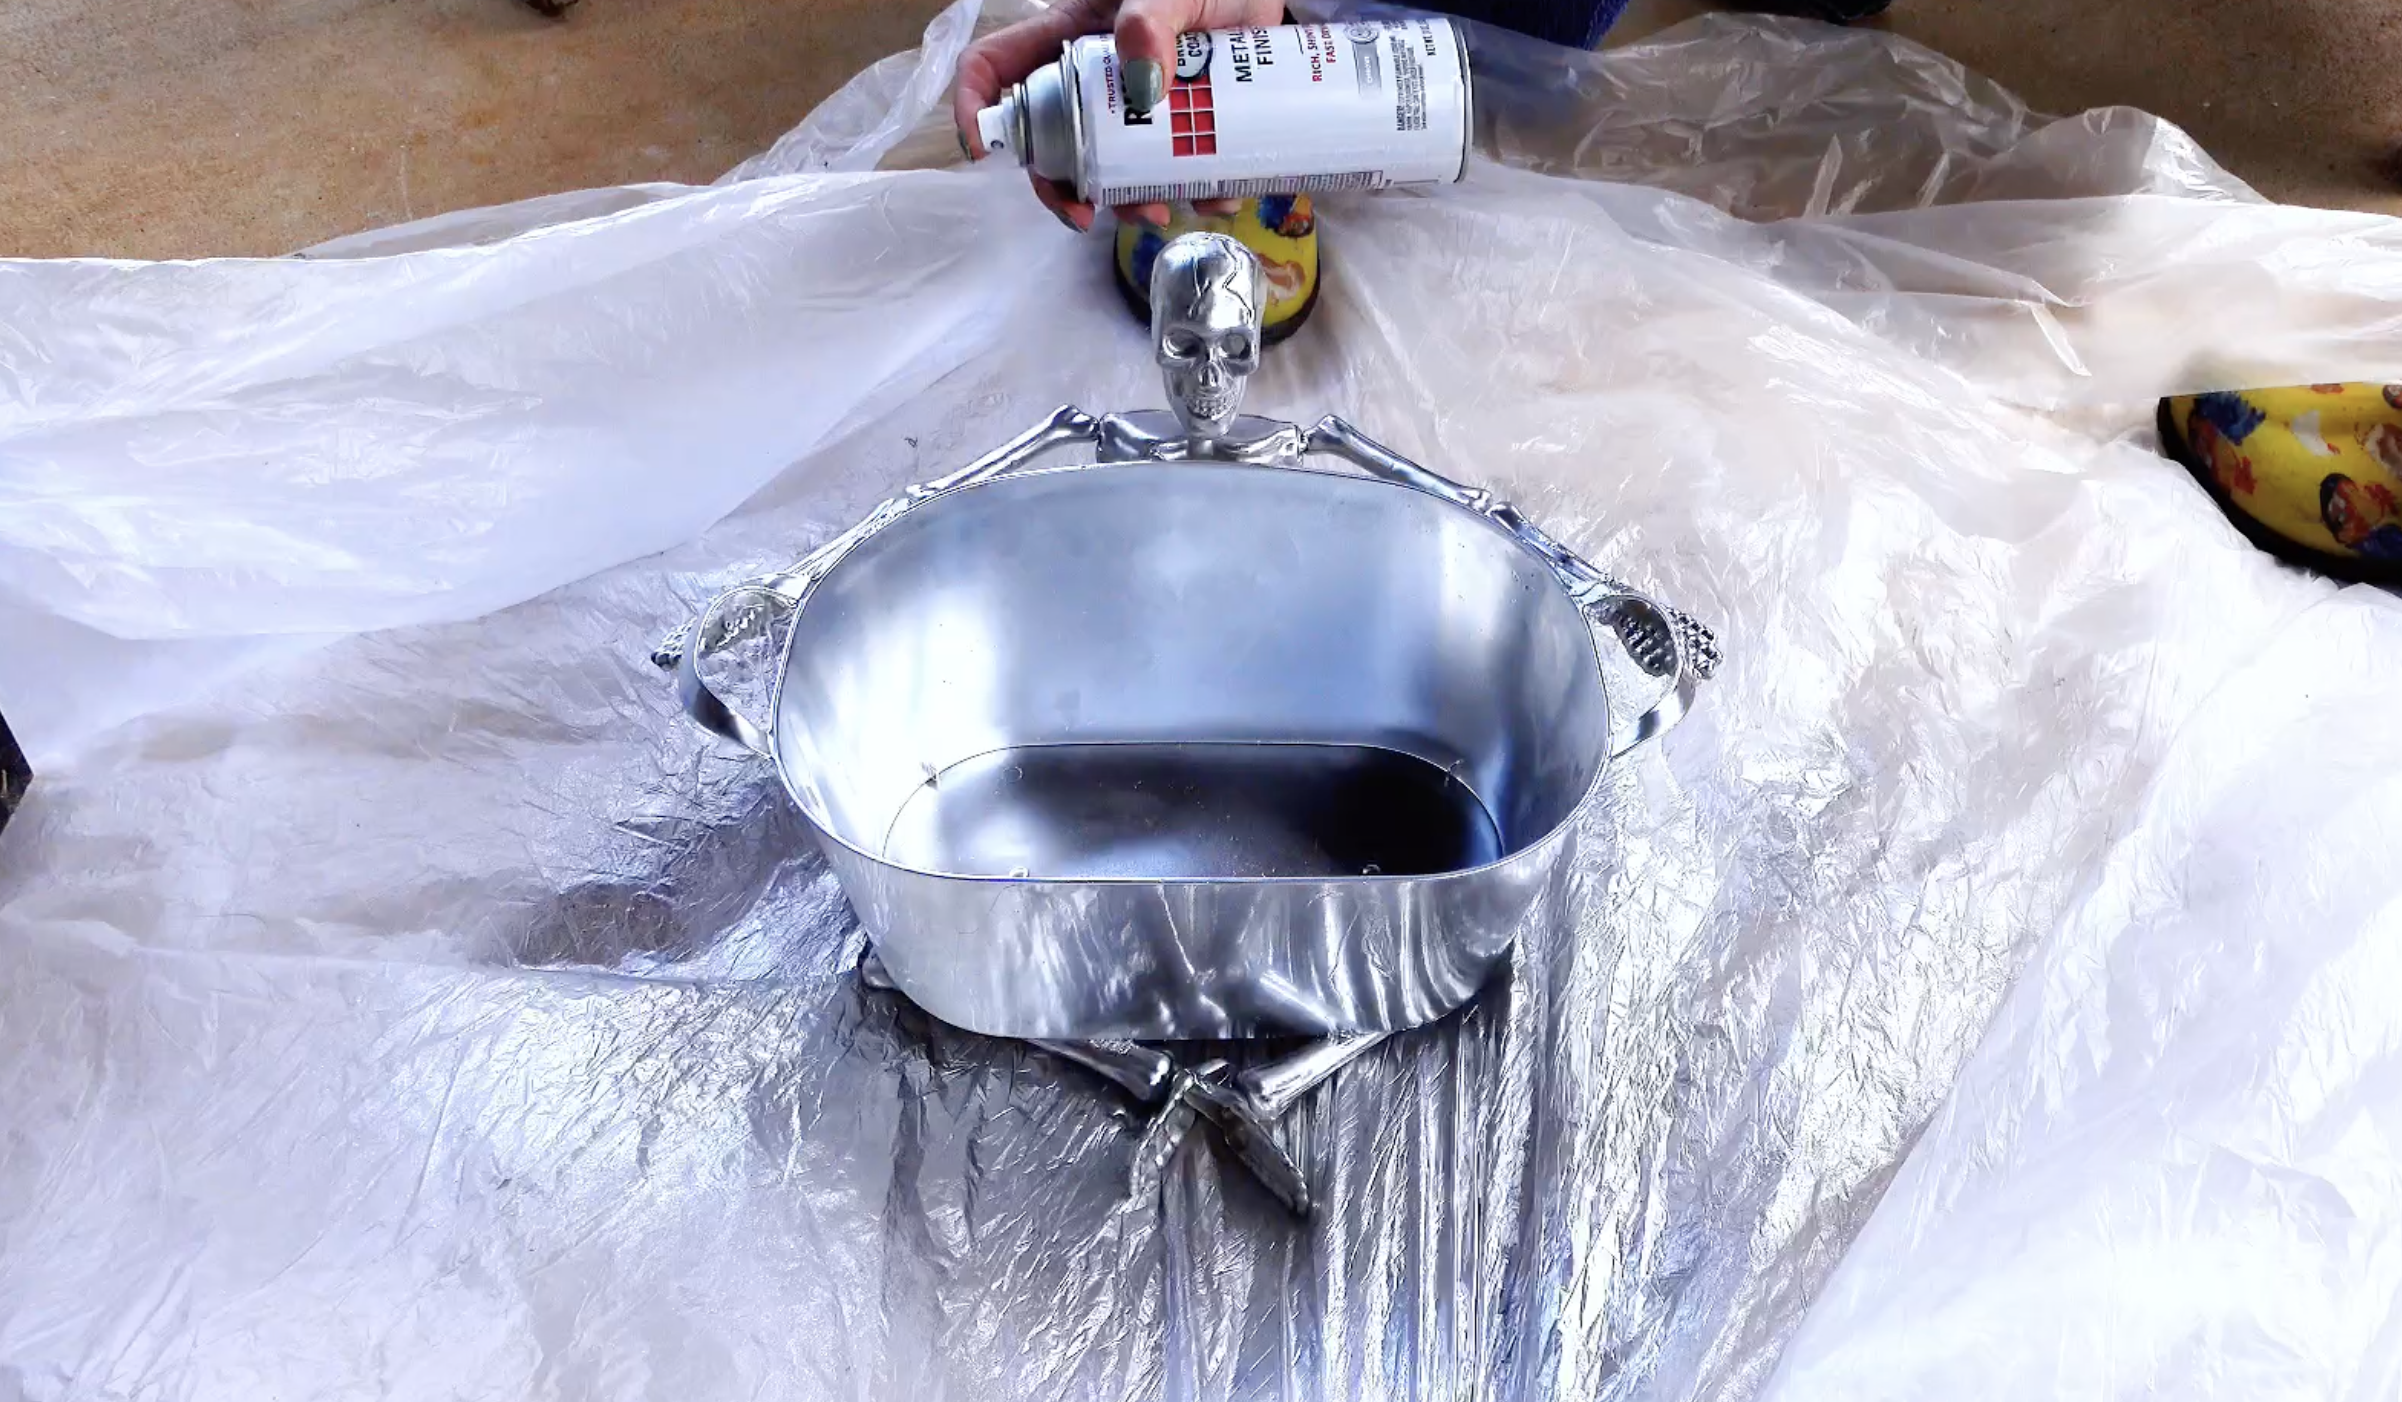
For extra detail, use a small brush and metallic black paint to add shadows on the skull, teeth, and bones. This step is optional, but it’s a great way to add depth and make the skeleton pop.
Step 5: Style and Fill Your Halloween Bowl
Once your project is dry, it’s ready to display! This makes an eye-catching Halloween candy bowl for your entryway, kitchen counter, or Halloween party table. Since it’s spray painted, stick to wrapped items like candy corn, lollipops, or chocolate bars. Avoid using it for unwrapped snacks or anything wet like a flavor popcorn tin with butter.

Pottery Barn vs. DIY
Pottery Barn’s version of this Halloween candy bowl retails for $110, and that’s on sale. My Dollar Tree-inspired version cost under $10 total. Not only is it budget-friendly, but you also get the fun of customizing your own halloween crafts. Choose your paint colors, experiment with bowl shapes, or even make multiple versions for different rooms.
This project proves you don’t need a big budget to create stylish Halloween decor that looks high-end.