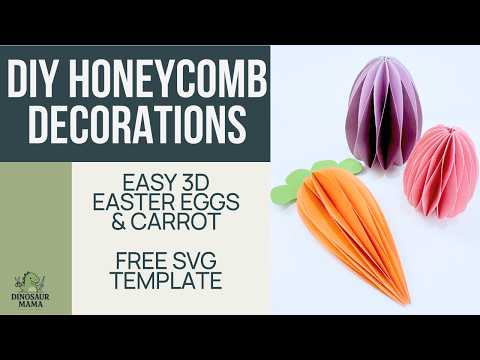
Honeycomb Easter Eggs DIY with Free SVG Template Download
If you love paper crafts that look way fancier than they actually are, you’re going to be obsessed with these honeycomb Easter eggs. They’re lightweight, beginner-friendly, and they create that gorgeous 3D “wow” effect with simple folding and gluing. This is a great way to add instant visual beauty to your home, classroom, or party setup without buying store-bought décor.
Today I’m sharing my Easter honeycomb eggs + matching honeycomb carrot as a free SVG template download (both designs are in one file). You can resize the cut file to any appropriate size, so the size of each hanging Easter egg decoration is totally up to you. Whether you want tiny tabletop accents or oversized fun photo backdrop décor, these paper eggs are the perfect little project for the spring season, especially if you love bright colors, texture, and a little touch of whimsy.
What Are Honeycomb Easter Eggs?

Honeycomb Easter eggs are layered paper eggs that open into a dimensional, fan-like shape kind of like honeycomb balls, but in a cute Easter egg silhouette. I have also included a honeycomb carrot template for Easter as well.
The layers alternate glue placement so when you open them, you get that signature dimensional pop and a fun dimensional surprise.
These honeycomb projects are perfect for:
- Easter parties (hello themed event décor!)
- Classroom crafts and bulletin boards
- Home styling alongside decorative wreaths, Easter mini trees, and seasonal displays
- A springy Easter basket centerpiece or mantel moment
Free SVG Download (Design #217)
This free honeycomb set is inside my Community Vault.
These designs are #217.
You’ll receive:
- 1 honeycomb egg template
- 1 honeycomb carrot template
(All in one zip file, ready for uploading & resizing.)
To access the free cut files:
- Enter your email address below.
- Wait for the Welcome Letter to arrive with the password then enter the Community Vault. Make sure to check spam and promotions.
- Download the zip folder and unzip.
- Upload the SVG into Cricut Design Space.
These free Spring SVG files are for personal use. I do include a small business commercial use license for handmade physical products.
Learn how to download files here.
Do not share the zip folder directly. Always send friends to the original post so they can grab their own free files.
Materials You’ll Need
Here’s what I recommend for the cleanest cuts and the best structure:
*This blog contains affiliate links, please see my full disclosure here*
- Cardstock: 65 lb smooth cardstock works beautifully, and textured cardstock looks stunning too (both work!)
- Craft glue: I like Bearly Arts. It’s fast-drying glue, perfect for stacking layers
- Cricut or any other cutting machine. You can absolutely cut these out by hand as well.
- Cricut mat
- Scoring stylus / scoring wheel (optional)
- Brayer (optional)
- Paper clips or binder clips: to hold layers while drying (optional)
- Scraper/bone folder (optional)
- String or ribbon for an attached hanging string (optional)
Want extra sparkle? Add gold glitter cardstock accents or use the finest honeycomb tissue paper as a mixed-media layer for a bold, luxe look. These also pair perfectly with cake toppers and party décor for a cohesive Easter collection.
Step-by-Step: How to Make Honeycomb Easter Eggs
This tutorial covers the egg and carrot using the exact same technique. Once you learn the pattern, you can make honeycomb Easter eggs in any shape: hearts, trees, balloons, you name it.
Step 1: Upload the SVG and Resize
When you upload the file, it may appear tiny at first. Do a quick resize just to see the file. Then:
- Ungroup the design (so the egg and carrot pieces are separate).
- Decide on your appropriate size.
- Make sure to size the carrot and topper together.
You truly can make these any appropriate size, but here are some easy starting points:
- Egg: 3–4 inches tall (great for garlands and baskets)
- Carrot: 4 inches tall (cute for banners)
Because any size works, the size of each hanging Easter egg decoration depends on your display. Want a big statement? Go larger. Want small accents? Scale down. The nice part is that honeycomb eggs still look amazing at multiple sizes.
Step 2: Change the Score Line (Optional)

In the layers panel, change the center line from “Basic Cut” to “Score.”
No scoring tool? No problem: delete the line and hand-fold. This project is forgiving, and the fold is just a guide.
Step 3: Duplicate Your Pieces
This is where the honeycomb magic happens.
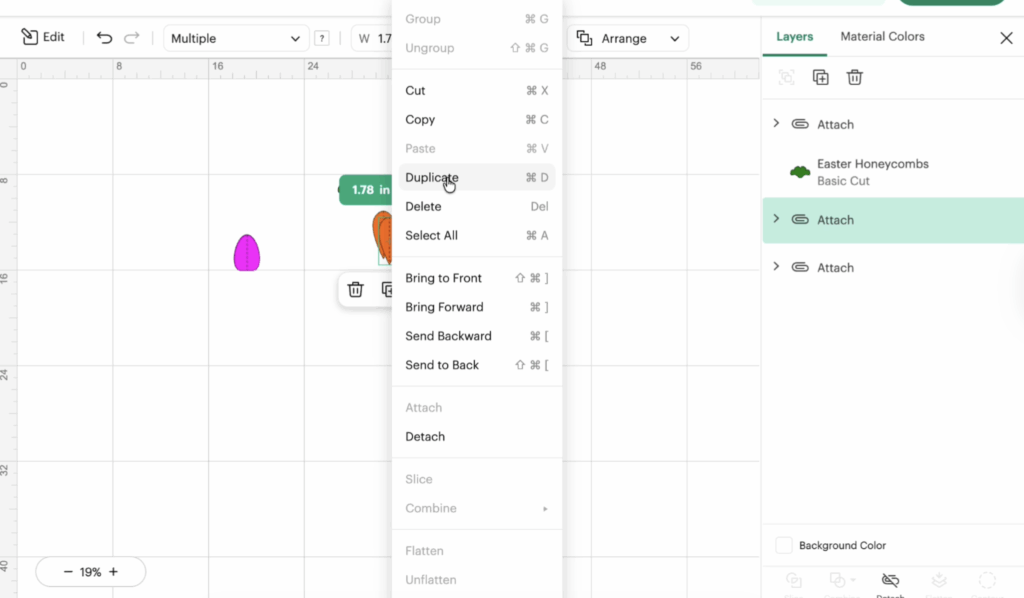
- For the egg: duplicate 10–15 times (minimum 10 works)
- For the carrot: duplicate 15–20 times for a full shape
(If you only want a half honeycomb, you can use fewer.)
Each layer is an egg piece (or carrot piece) that folds and stacks. More layers = more honeycomb detail.
Step 4: Cut Your Pieces
Choose a cardstock setting like “Medium Cardstock.”
Pro tip: Cricut won’t always arrange pieces efficiently (still waiting on that nesting button!), so move pieces around on your mat preview to fit more on one sheet and save materials. Especially if you’re using new arrivals cardstock you’re excited about. But don’t be like me and overlap pieces!
Step 5: Fold Every Piece in Half
Fold every egg piece down the center line.

Textured cardstock is a little harder to fold, but it still works. Smooth 65 lb cardstock folds like a dream for these paper eggs.
Step 6: Glue Using the Honeycomb Pattern
This is the key step for honeycomb Easter eggs and carrots.
You’ll glue in a repeating pattern:

- A line down the middle
- Then glue the outer edges
- Next piece: middle again
- Next piece: edges again

That alternating pattern is what creates the honeycomb structure when you open it.
If you make a mistake, wipe it off and keep going. These honeycomb eggs and carrots are very forgiving, and tiny glue errors usually disappear once it’s opened.
Use paper clips or binder clips if you need help holding stacked layers while glue dries.
For the carrot: you’ll want to do half the pieces and then the other half. This is so you can sandwich the top in between. I did 18 pieces total so I built 9 and then an additional 9.

Step 7: Close the Loop to Finish the Shape
Once your stack is dry enough to handle:
- Add glue to the top and bottom edges (like you did before)
- Bring the first and last piece together to make the full egg

Hold it closed for a bit until it sets. This is where the dimensional pop really shows up.
Now open it carefully and enjoy that dimensional surprise: your honeycomb eggs are done!
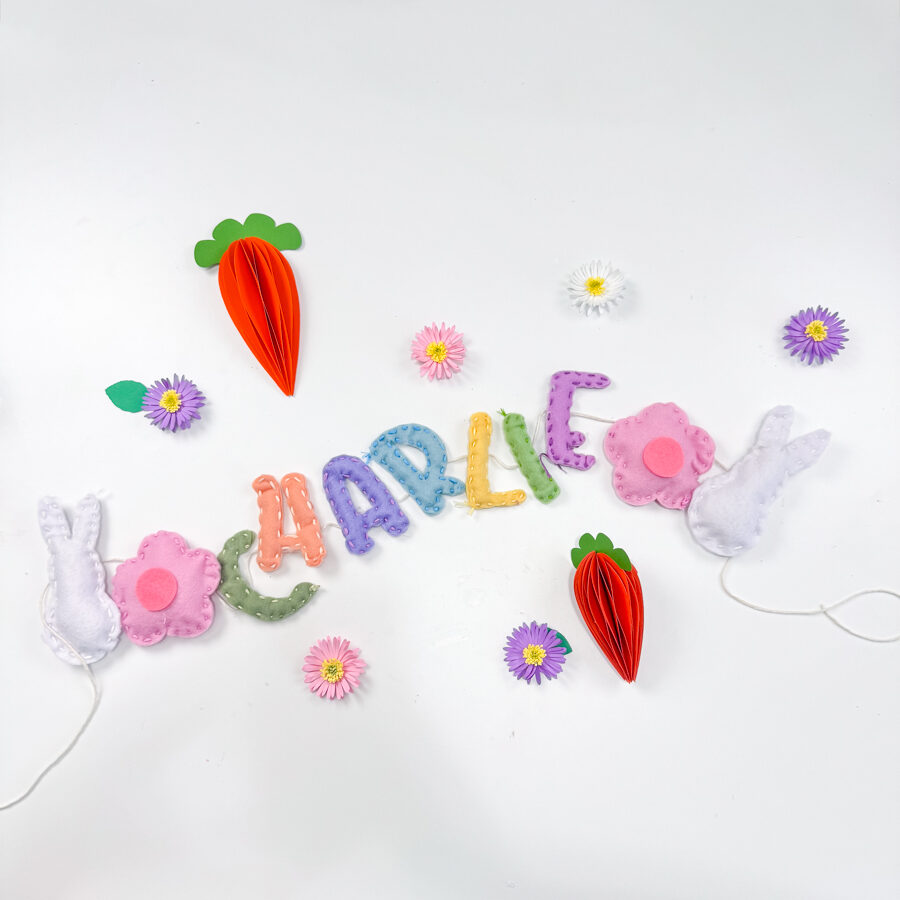
How to Use Your Colorful Honeycomb Paper Easter Eggs
These colorful honeycomb paper Easter eggs are such a great way to decorate for the spring season, and they look incredible mixed with different papers and textures.
Try these ideas:
- Add an attached hanging string and make a garland across a mantel
- Use them as a centerpiece in an Easter basket
- Hang them on a branch tree as Easter decorations
- Build a fun photo backdrop for a church/class party or themed event
- Mix bright colors with neutrals for a little vintage charm
- Pair with decorative wreaths or place near Easter mini trees
- Add gold glitter accents for sparkle and extra visual beauty
You can even coordinate them with your full Easter collection: matching banner pieces, treat tags, party signage, and cake toppers.
Troubleshooting Tips
- Score lines too light? Duplicate the score line and attach, or just fold manually.
- Pieces shifting? Use paper clips (or binder clips) while drying.
- Glue drying slow? Work in smaller stacks and let sections set before adding more.
- Edges not lining up perfectly? That’s okay. Once opened, the honeycomb pattern hides minor imperfections.
- Want sturdier eggs? Choose high-quality paper or slightly heavier cardstock.
Final Thoughts
If you want easy Easter decorations with maximum payoff, honeycomb Easter eggs are it. They’re the perfect little project you can customize with bright colors, textured cardstock, glitter, or even finest honeycomb tissue paper. And because any appropriate size works, the size of each hanging easter egg decoration can match your exact space: party, classroom, or home.
Go grab the free SVG (Design #217), make a few honeycomb eggs, and tag me when you hang up your colorful honeycomb paper Easter eggs. I can’t wait to see what you create! Stay Crafty!


Where is the file to download. You give all of the instructions and supply list but I can’t find the file. Thank you.
Hi! I give download instructions right above materials. They are in the community vault number 217 https://dinosaurmama.com/community-members-only-svgs/