
How to Make a Banner SVG in Inkscape for Cricut


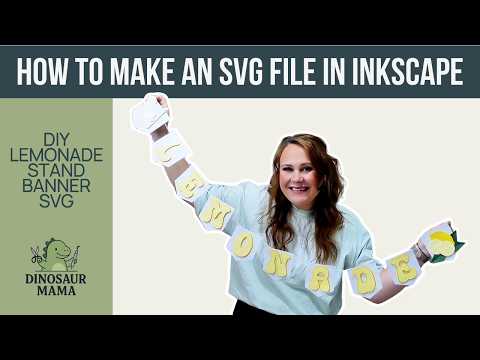
If you have ever wanted to learn how to make your own SVG files, creating a simple banner SVG is one of the best places to start. In this tutorial, I am going to walk you through how to make a banner SVG in Inkscape using a cute lemonade stand theme. Even though we are making a lemonade banner, these same techniques can be used for birthday banners, classroom decorations, baby showers, seasonal crafts, and so much more.
One of the things I love most about learning to create SVG files is that you are no longer limited to what is available in Cricut Design Space. You can create completely custom designs, sell your own SVG files, upload them to Etsy, or simply make personalized crafts for your family.
What You Need
Before starting this banner SVG tutorial, make sure you have:
- Inkscape installed on your computer
- A font downloaded and installed
- Cricut Design Space if you plan to cut the file
Inkscape is completely free to use, which makes it one of my favorite programs for Cricut users who want to learn SVG design.
What is a Banner SVG?
A banner SVG is simply a layered cut file designed to create a banner. Each banner piece is usually separated into individual pennant shapes that can be cut from cardstock or vinyl and assembled into a hanging banner.
For this project, we are creating:
- Banner pennants
- Layered text
- Lemon slices
- A glass of lemonade
- Leaves and decorative pieces
The final file can be uploaded directly into Cricut Design Space.
How to Make the Banner SVG in Inkscape
Step 1: Open Inkscape
Open Inkscape on your computer and create a new document.
Helpful Tip: Do not worry about making everything perfect right away. Learning Inkscape takes practice. The best way to improve is simply to keep experimenting with shapes and tools.
Step 2: Create Your Banner Shape
The first part of this banner SVG is the pennant shape.
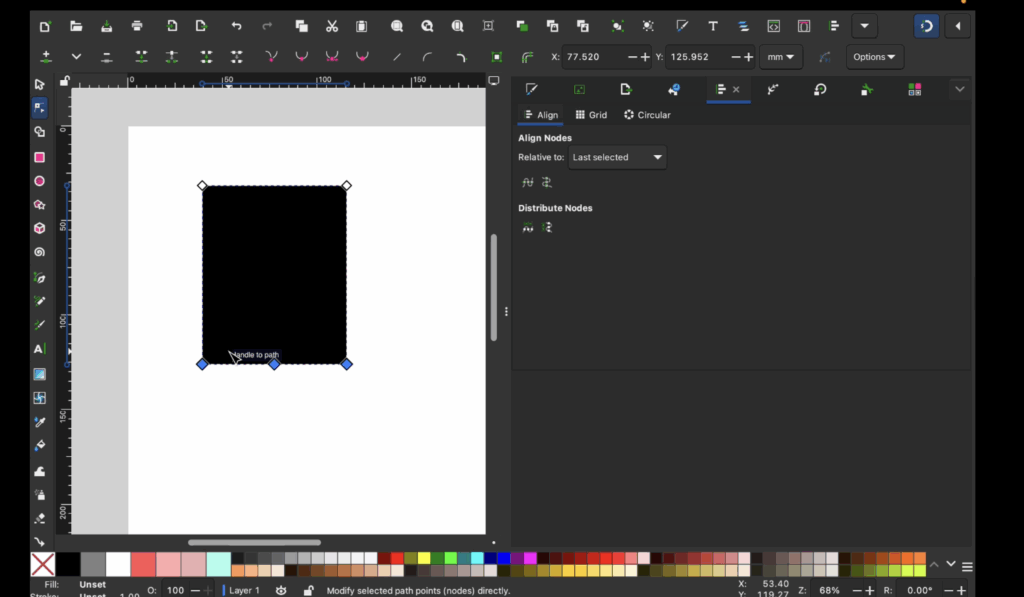
To create the banner piece:
- Select the rectangle tool
- Click and drag to create a rectangle
- Change the width to about 3 inches
- Change the height to about 3.5 inches
Now we need to turn the rectangle into a custom shape.
Convert the Shape to a Path
- Click on the rectangle
- Go to:
- Path
- Object to Path
This allows you to edit the shape using nodes.
Add the Banner Point
- Select the node tool
- Highlight the two bottom nodes
- Click “Insert New Nodes”
- Select the middle node that appears
- Drag it downward
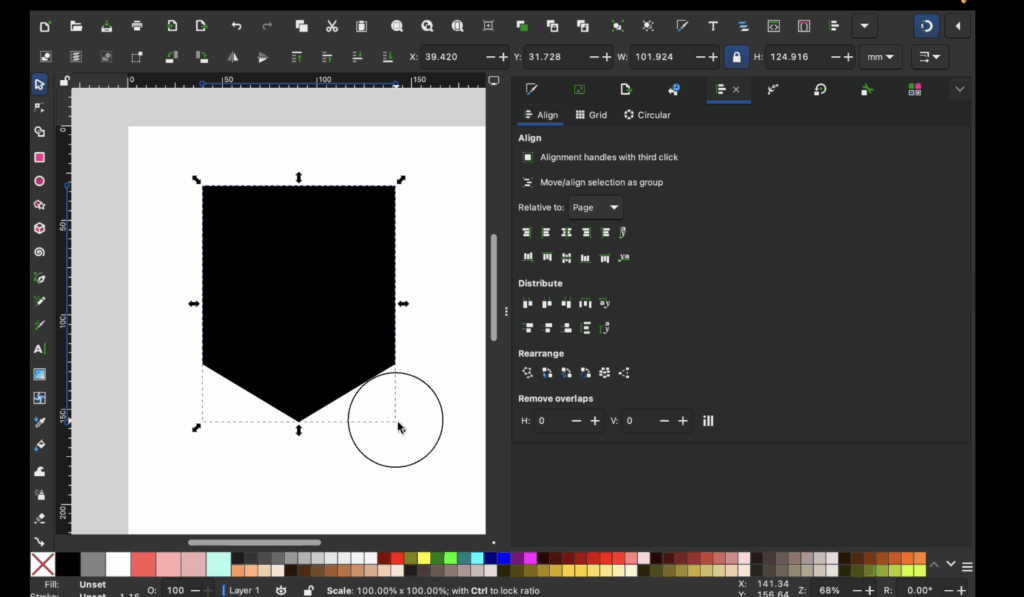
This creates the pointed banner shape.
Your first banner SVG piece is complete.
Step 3: Duplicate the Banner Pieces
Instead of creating each pennant from scratch, simply duplicate the shape.
To duplicate:
- Right click and choose Duplicate
OR - Use the keyboard shortcut shown in your drop down. For a Mac it is command + D
Repeat this until you have enough banner pieces for your word.
Step 4: Add Text to Your Banner SVG
Now it is time to add the letters.
Add Your Word
- Select the text tool
- Type your word
- Choose your font at the top toolbar
For this project, a retro style font works perfectly for the lemonade stand theme.
Important Font Tip: Always make sure the font you are using allows commercial use if you plan to sell your banner SVG.
Step 5: Convert Text Into SVG Shapes
Text cannot stay editable if you want to properly cut it with Cricut.
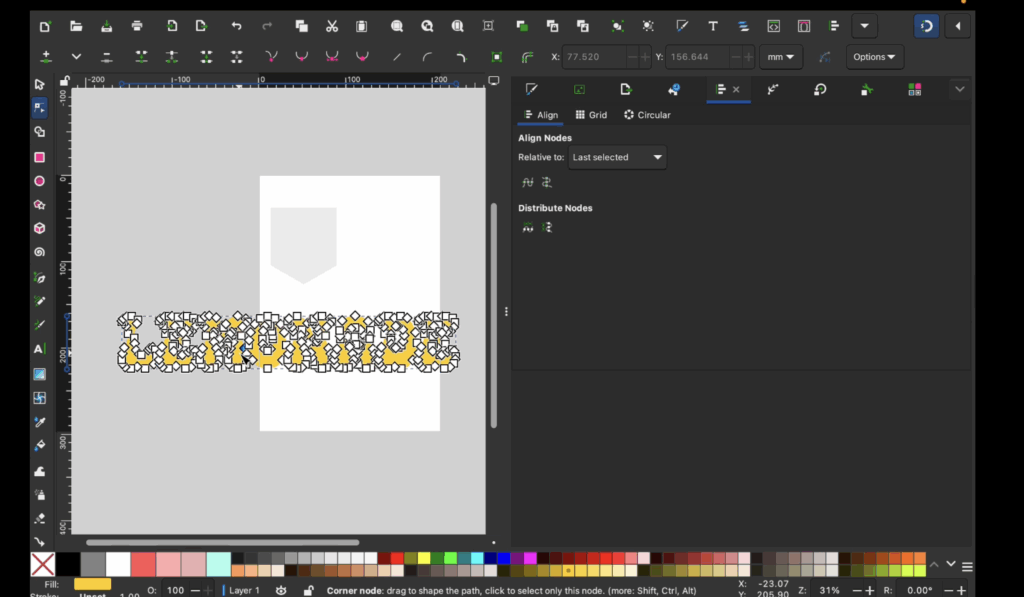
Convert Text to a Path
- Select your text
- Go to:
- Path
- Object to Path
Now your text becomes editable shapes.
Step 6: Separate the Letters
Right now the letters are still grouped together.
Break Apart the Letters
- Go to:
- Path
- Break Apart
Now every letter becomes an individual object.
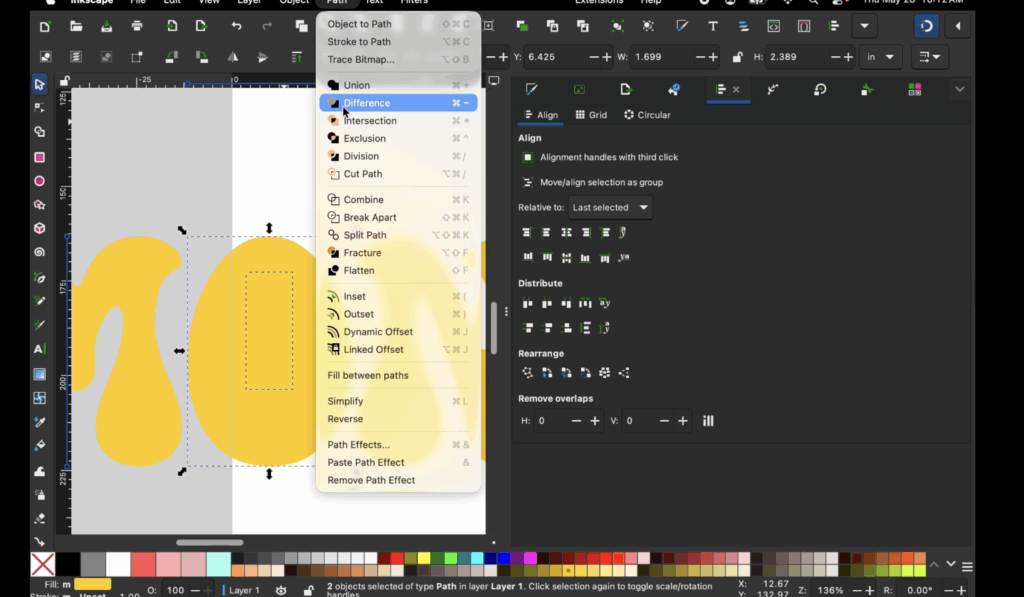
Fix the Inside of Letters
Letters like:
- A
- O
- D
- P
may become solid.
To fix this:
- Select the outside shape and inside shape
- Go to:
- Path
- Difference
Repeat for each letter that has an opening.
Step 7: Center the Letters on the Banner Pieces
Place one letter on each banner shape.
If your side toolbar is missing:
- Go to:
- Object
- Align and Distribute
Use the center alignment option to center each letter.
You can also use your arrow keys to slightly adjust placement.
Step 8: Add a Shadow Layer to the Text
This is one of my favorite ways to make a banner SVG stand out.
Duplicate the Letters
- Select all letters
- Duplicate them
- Change the duplicate color
Create an Offset
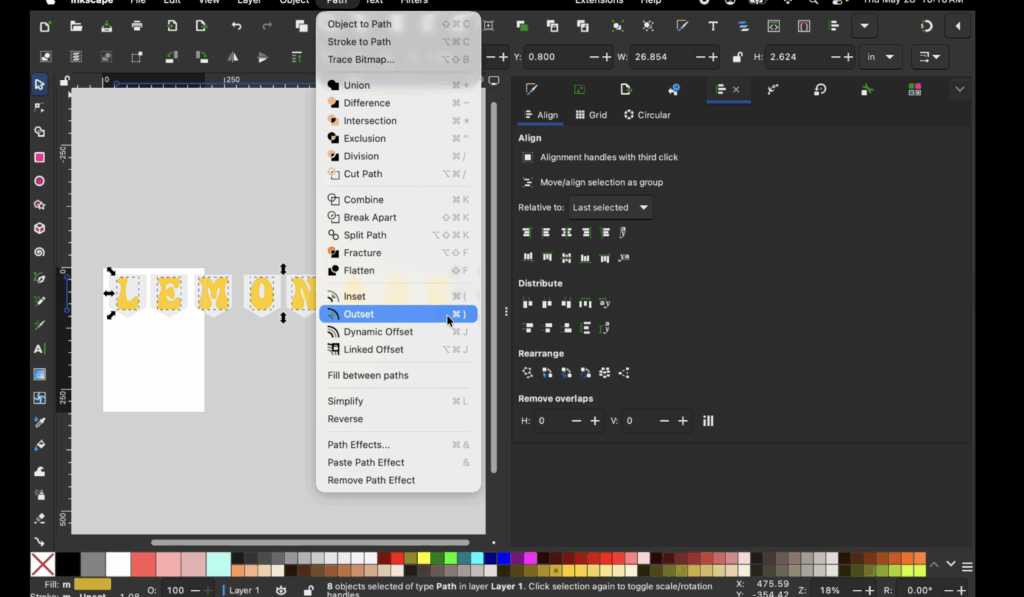
- Go to:
- Path
- Outset
Repeat until the outline is as thick as you want.
Move the “shadow” layer behind the original letters.
This creates a layered paper effect that looks beautiful on cardstock banners.
Step 9: Create a Lemonade Glass
Now it is time to make the decorations.
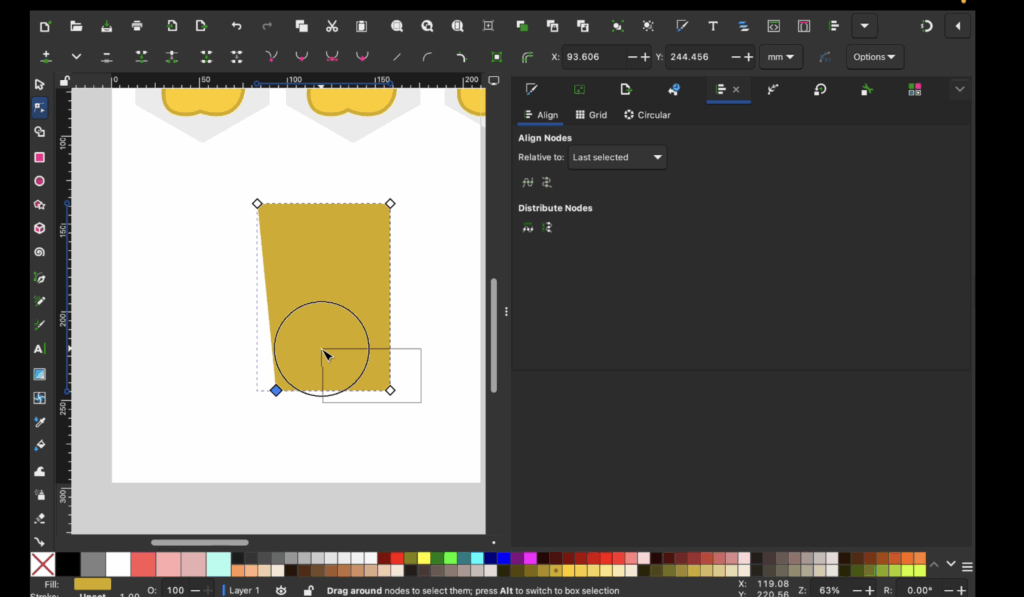
Create the Cup Shape
- Use the rectangle tool
- Convert it to a path
- Use the node tool
- Pull the bottom nodes inward slightly
This creates the shape of a drinking glass.
Add Lemonade
- Create another rectangle
- Add nodes across the top
- Pull alternating nodes downward
- Use “Auto Smooth” to soften the waves
This creates a wavy lemonade effect.
Use:
- Path
- Intersection
to fit the lemonade perfectly inside the cup.
Step 10: Add a Straw and Ice Cubes
Make a Straw
- Create a thin rectangle
- Rotate it
- Place it behind the lemonade layer
Make Ice Cubes
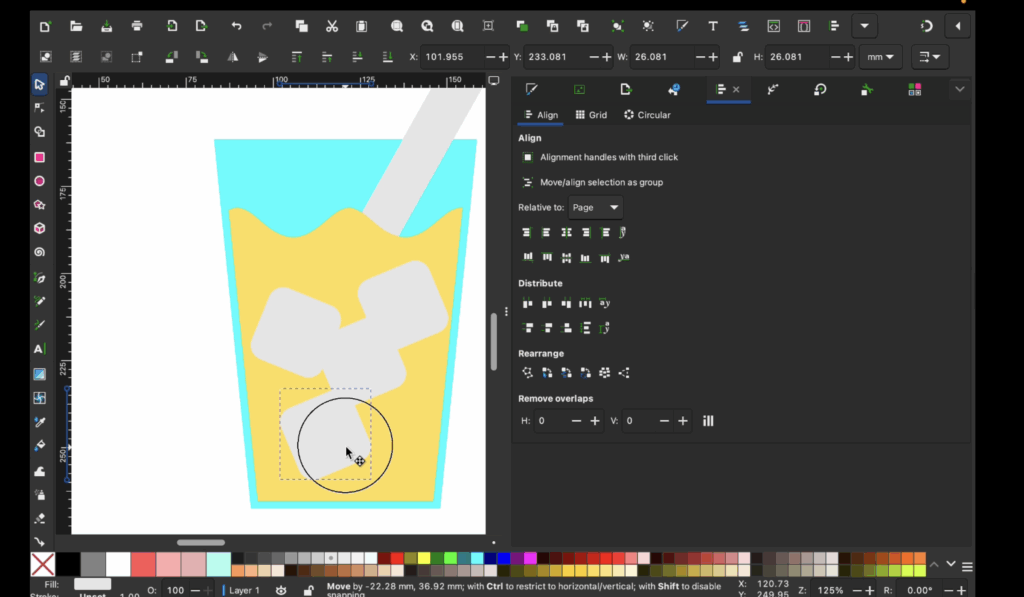
- Create small rounded squares
- Duplicate them
- Scatter them inside the glass
Remember that all pieces are individual layers in your banner SVG.
Step 11: Create Lemon Slices
Lemon slices are surprisingly easy to make in Inkscape.
Create the Lemon Base
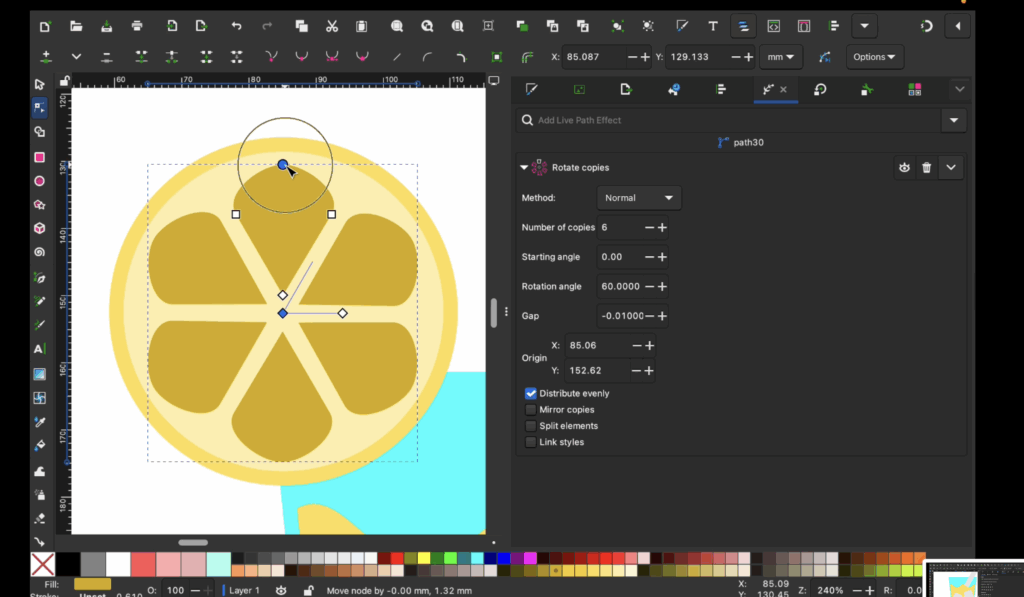
- Use the circle tool
- Duplicate the circle
- Use inset to make the inside smaller
Create the Sections
- Use the star tool
- Change corners to 3
- Round the edges
- Use rotate copies in Path Effects
Once centered, use:
- Path
- Difference
to cut the lemon sections into the circle.
Now you have a layered lemon slice perfect for your banner SVG.
Step 12: Add Leaves
Leaves are very simple.
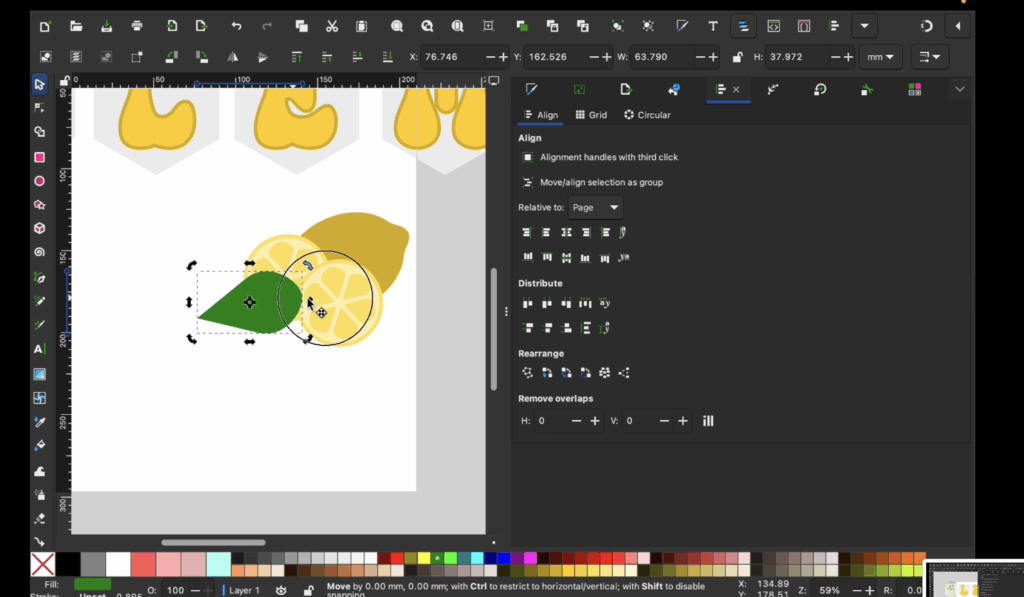
Create a Leaf
- Use the oval tool
- Convert to path
- Pull the side nodes inward
- Adjust the top and bottom
Duplicate and rotate the leaves for a natural look.
Step 13: Save Your Banner SVG
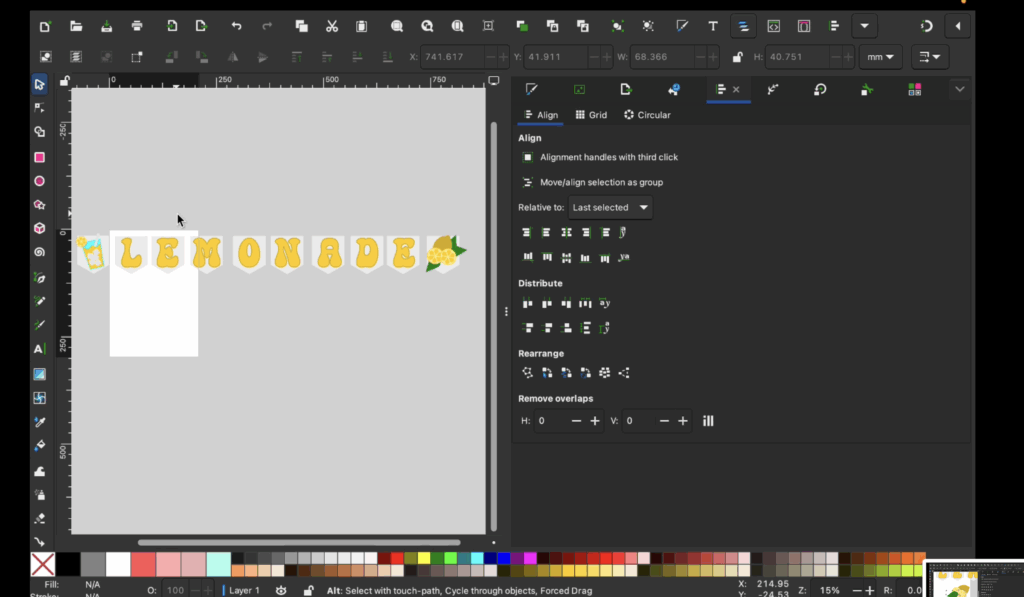
When your design is complete:
- Go to:
- File
- Save As
- Save as:
- SVG
Your banner SVG is now ready for Cricut Design Space.
Step 14: Upload Into Cricut Design Space
Open Cricut Design Space and upload your SVG file.
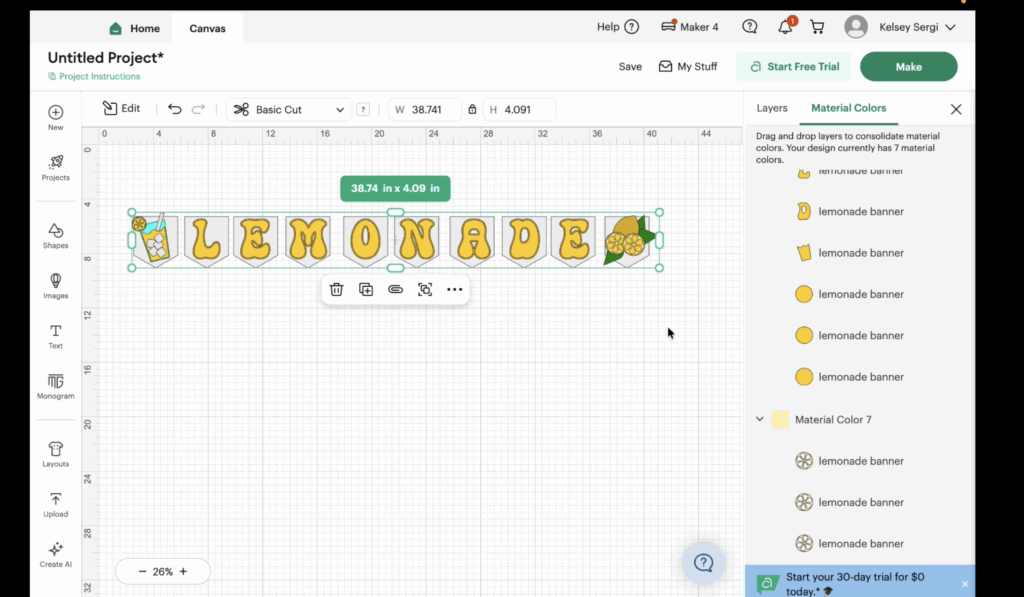
You should see:
- Individual layers
- Separated colors
- Ready-to-cut pieces
You can resize the entire project if needed before cutting.
Final Thoughts on Making a Banner SVG
Learning how to make a banner SVG in Inkscape may seem overwhelming at first, but once you understand paths, nodes, duplication, and layering, the process becomes much easier.
This lemonade stand banner is a great beginner SVG project because it teaches:
- Shape creation
- Layering
- Offsets
- Node editing
- Path tools
- SVG exporting
The more you practice, the easier creating SVG files becomes.
You can use these same methods to create:
- Birthday banners
- Classroom banners
- Holiday decorations
- Baby shower banners
- Wedding signs
- Party decor
And the best part is that your SVG files are completely your own.
How to Download the Free Banner SVG File
This free Lemonade BannerSVG file is available inside my Community Vault Design Number #228.
Here’s how to get it:
- Enter your email below
- Check your inbox for the password (will be sent within 5-10 min, check spam and promotions!)
- Open the vault with the password sent
- Download the zip file and then follow the instructions below.
Learn how to download the files here.
Important Usage Info
These free downloads are intended for personal use, but I do include a small business commercial use license for handmade physical items.
If you enjoyed this tutorial, make sure to check out my other Inkscape tutorials and grab the free lemonade banner SVG download.
Stay Crafty!


