Adding Glyphs in Cricut: Use Special Characters – Mac & PC
If you have ever seen those extra swirls, hearts, tails, and decorative letters in fancy fonts and wondered how people add them into their designs, you are in the right place. Today I am walking you through adding glyphs in Cricut step-by-step for both Mac and Windows users.
These extra design elements are called font glyphs, and they can completely transform a simple design into something that looks custom and professional. Whether you are making wedding signs, tumblers, shirts, cards, or other fun Cricut crafts, learning how to use special characters is such a helpful skill.
The good news is you do not need expensive software like Adobe Illustrator to do this. You can easily use Cricut Design Space along with the tools already built into your computer.
I will show you exactly how to access special font characters on both a Mac computer and a Windows PC, plus how to insert them into a text box inside Cricut Design Space.

What Are Font Glyphs?
Before we jump into the tutorial, let’s quickly cover what glyphs actually are.
Font glyphs are extra design elements included inside certain fonts. These can include:
- Decorative letters
- Swashes
- Hearts
- Flourishes
- Tails
- Alternate characters
- Different stylistic versions of letters
Many script fonts include these extra details to make your text look more handwritten or elegant.
Some fonts include only a few extras, while others have pages and pages of font extras hidden inside the file.
When adding glyphs in Cricut, you are basically copying these extra characters from your computer and pasting them into Cricut Design Space.
Before You Start
Before using glyphs, make sure your font is installed on your computer correctly.
Most fonts come as a:
- TTF file
- OTF file
A TTF file works perfectly with Cricut Design Space.
If you need help installing fonts first, watch my full YouTube tutorial here:
How to Download Fonts Tutorial
You can also browse my ongoing list of free fonts here: Free Cricut Fonts List
After installing your font, completely close and reopen Cricut Design Space so the software can recognize the new font.
How to Use Glyphs on a Mac Computer
If you are using a Mac computer, you will use the built-in Font Book application to access your font glyphs.
Step 1: Open Font Book
On your Mac:
- Open Finder
- Go to Applications
- Open Font Book
This is where all installed fonts are stored on your computer.
Step 2: Find the Name of the Font
Inside Font Book, use the search bar in the top corner to locate the font you want to use.
Click the name of the font once to highlight it.
Many script fonts contain multiple pages of special characters, so scroll around a little bit to see what the font includes.
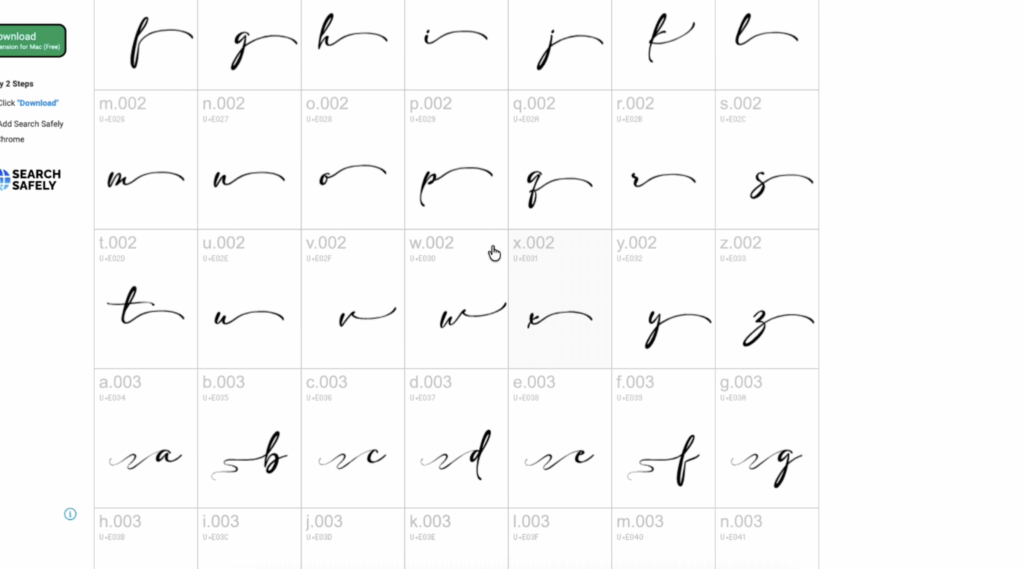
Step 3: View the Glyphs
You may see:
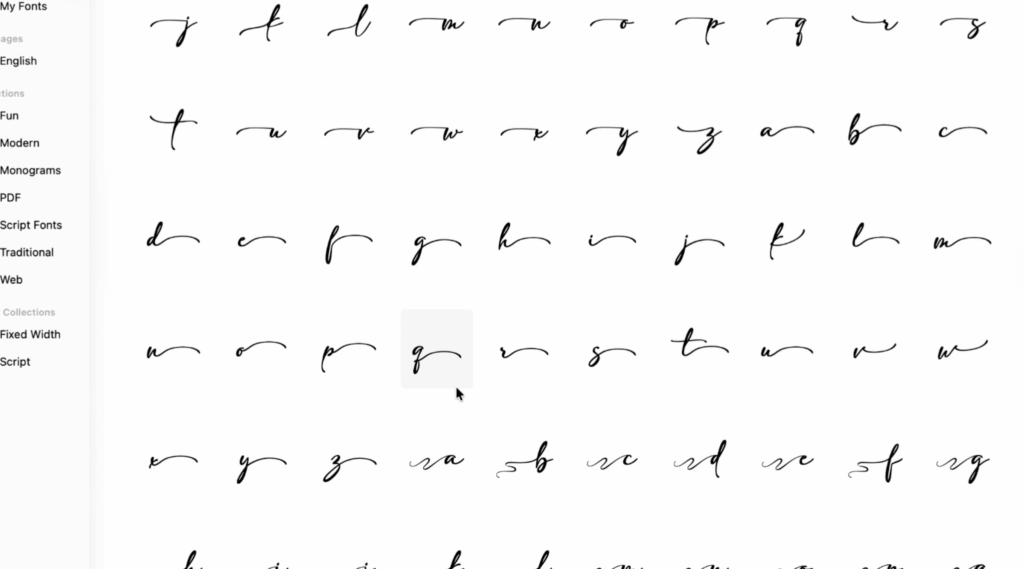
- Swashes
- Decorative letters
- Hearts
- Fancy uppercase letters
- Different glyphs
Step 4: Copy the Special Character
Click on the special characters you want to use.
A small popup window or little box may appear with an enlarged preview.
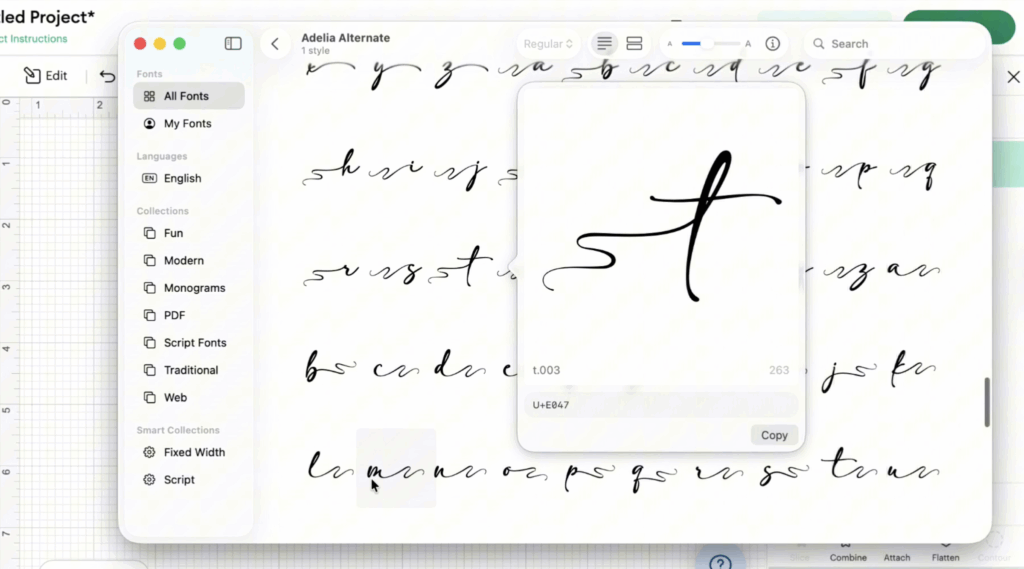
Double-click the glyph or press copy.
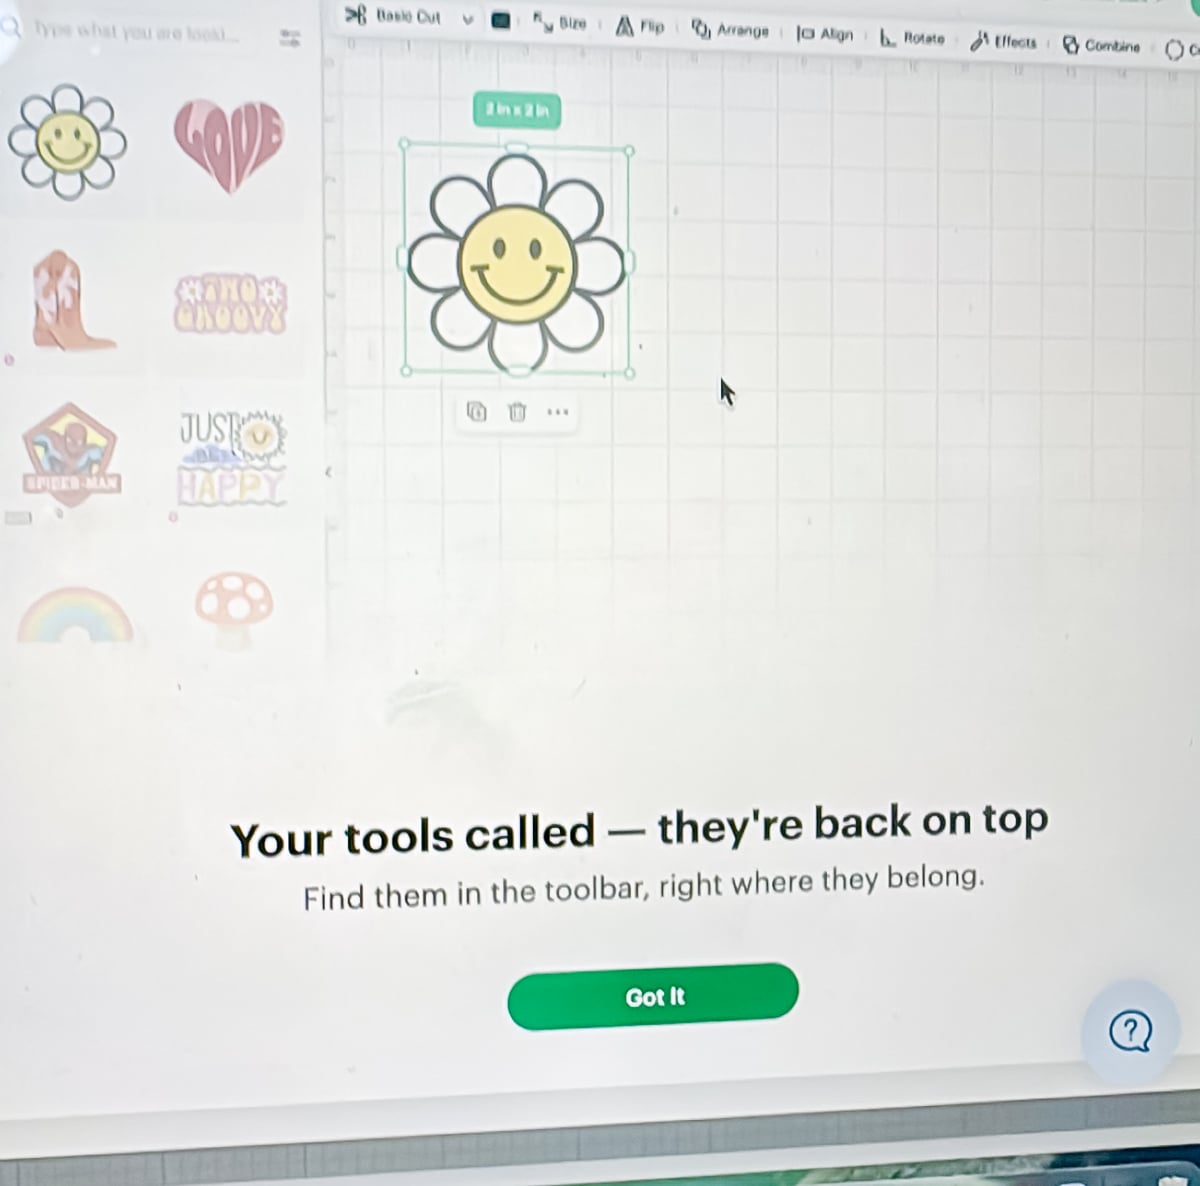
Step 5: Open Cricut Design Space
Now open Cricut Design Space and create a new project.
Add a text box to your canvas.
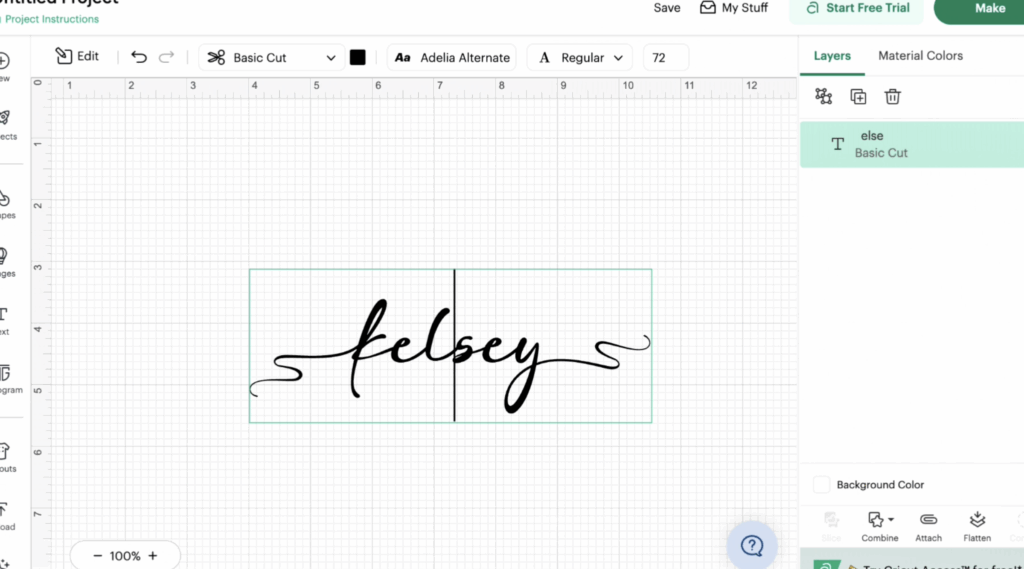
Type your word normally first.
Step 6: Paste the Glyph Into Cricut Design Space
Place your cursor inside the text box exactly where you want the glyph to appear.
Paste the copied glyph using:
- Command + V
That’s it!
You are officially adding glyphs in Cricut using a Mac.
You can repeat this process as many times as needed throughout your Cricut project.
How to Use Glyphs on a Windows PC
If you use a Windows computer, the process is a little bit different. Instead of Font Book, you will use the built-in Character Map tool.
The character map is incredibly useful for finding special characters and hidden font extras.
Step 1: Open Character Map
On your windows pc:
- Click the Start Menu
- Type “Character Map” into the search bar or charmap
- Open the application
Step 2: Select Your Font
Inside the character map, use the drop-down menu near the top to choose your font.
This is where knowing the exact name of the font matters.
Once selected, the character map will load all available glyphs and special font characters.
Step 3: Turn On Advanced View
Near the bottom of the character map, check the box for:
- Advanced View
This helps you access more different glyphs and organize the font better.
You may also see:
- Unicode subrange
- Group by categories
- Search tools
The unicode subrange option can help you locate specific alternate characters much faster.
Step 4: Select the Glyph
Click on the glyph you want to use.
A larger preview will appear in a little box.
Click:
- Select
- Copy
Now the glyph is saved to your clipboard.
Step 5: Add the Glyph Into Cricut Design Space
Open Cricut Design Space and start a new project.
Insert a text box onto your canvas.
Click inside the text box where you want your glyph to appear and paste it using:
- CTRL + V
Now your special characters should appear directly inside Cricut Design Space.
Troubleshooting Glyphs in Cricut Design Space
Sometimes adding glyphs in Cricut does not work perfectly the first time. Here are a few common issues and fixes.
The Font Is Not Showing in Cricut Design Space
If your font is missing:
- Save your project
- Go to view and reload
Sometimes the software simply needs a refresh after installing a TTF file.
The Glyph Pastes as a Box
If you paste a glyph and only see a blank square or weird symbol:
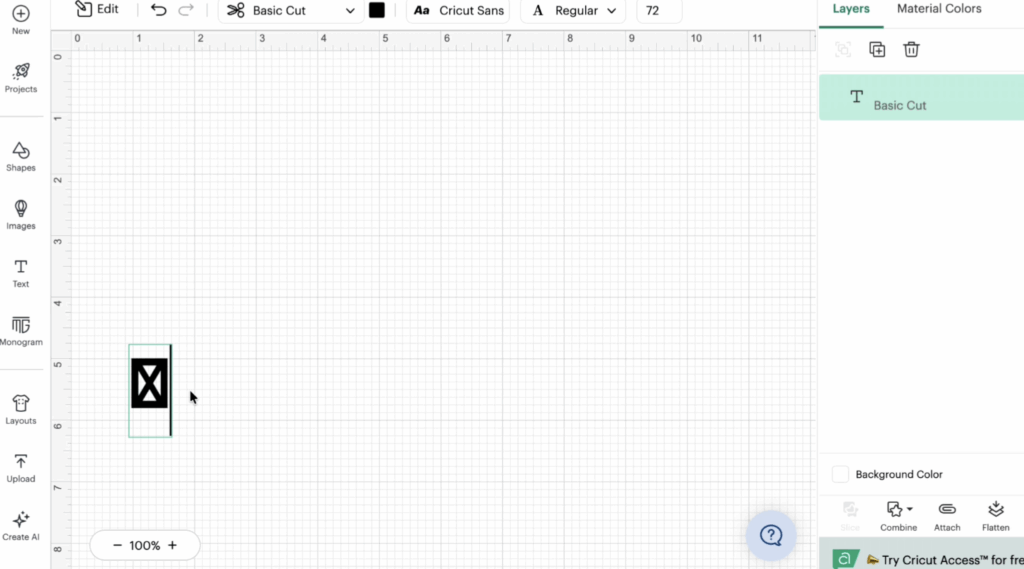
- The font may not support that character
- You may have copied the wrong symbol
- The glyph may only work in OTF format
Try selecting a different glyph from the character map or font book.
The Glyph Looks Different
Some special font characters display slightly differently inside Cricut Design Space compared to other software.
This is especially common with heavily decorative script fonts.
If needed, you can test another beautiful font or adjust your letter spacing (kerning) manually.
The Character Map Is Empty
If your character map looks blank:
- Make sure the correct font is selected in the dropdown menu
- Turn on advanced view
- Try another font with more built-in glyphs
Not all fonts contain font extras.
Final Thoughts on Adding Glyphs in Cricut
Learning to add glyphs in Cricut is one of those skills that seems intimidating at first, but once you try it, it becomes incredibly easy.
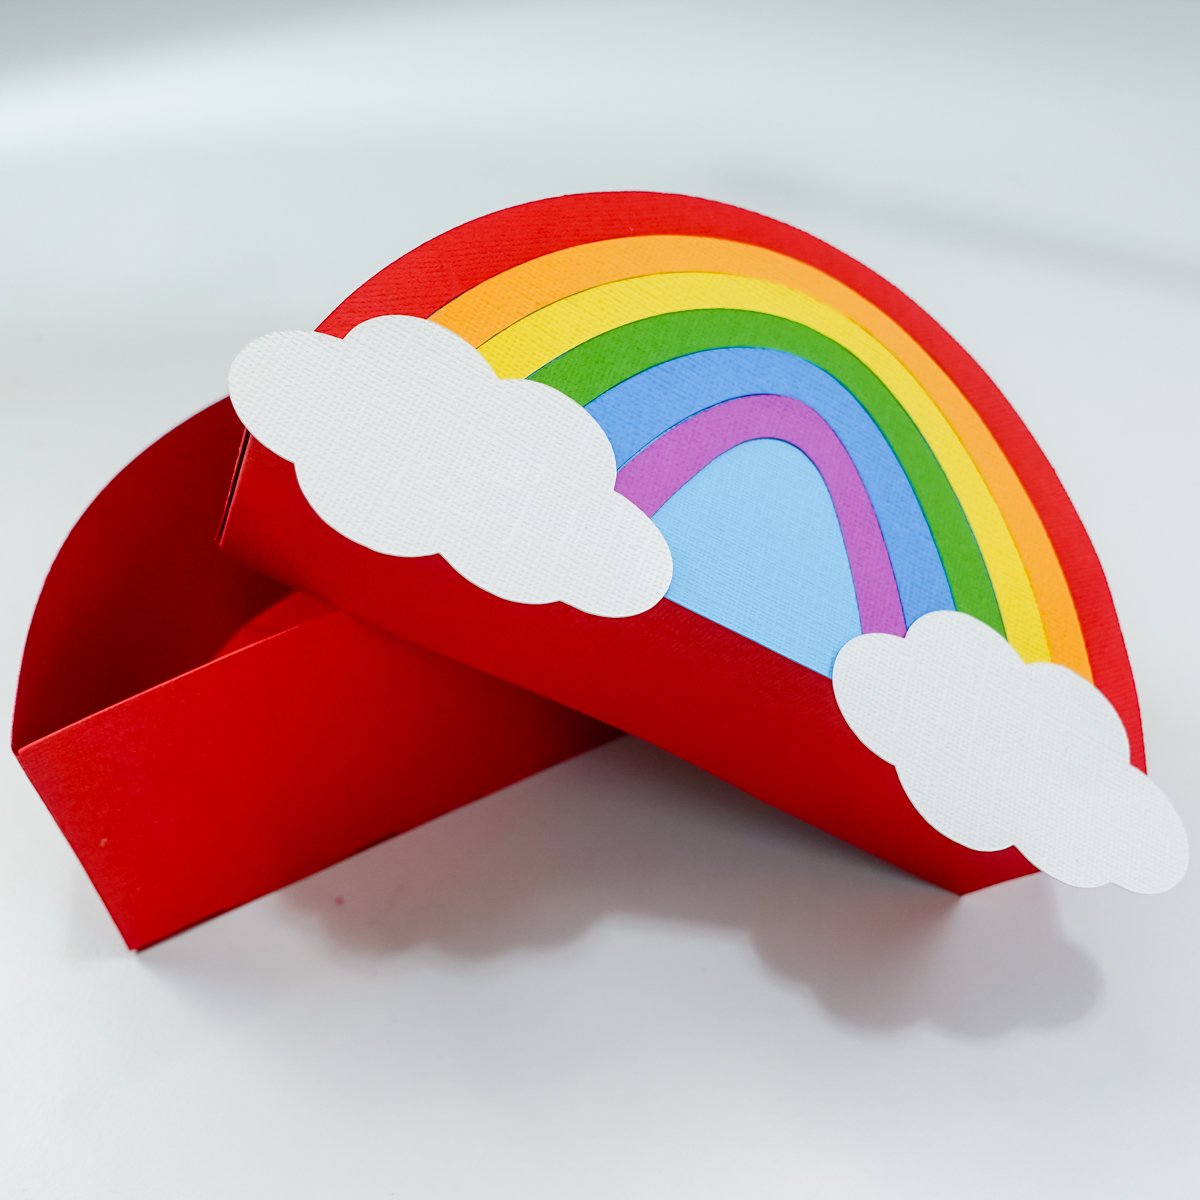
Using special characters and decorative elements can instantly elevate your designs and make your projects look much more custom and professional.
Whether you are using a Mac computer with Font Book or a Windows computer with Character Map, both methods work beautifully with Cricut Design Space.
I personally use this technique all the time for:
- Shirts
- Decals
- Personalized gifts
- Cards
- SVG projects
- Other fun Cricut crafts
If you love beginner-friendly tutorials, crafting tips, and freebies, make sure to join my newsletter so you never miss my latest weekly tutorials, new free SVG files, and Cricut inspiration.
Stay crafty!