Inkscape Beginner Tutorial: 2025 Craft Guide for Cricut
If you’ve ever wanted to design your own SVGs but felt daunted by digital design, you’re in the right place. This Inkscape beginner tutorial walks you through using Inkscape 1.4.2 on macOS with zero design experience required. By the end, you’ll have created your very first SVG (a mushroom!) ready for your Cricut, and you’ll know where to go next.

What Is Inkscape & Why Crafters Love It
Inkscape is a powerful, free, open-source vector graphics editor that’s perfect for makers and crafters. It’s designed around scalable vector graphic (SVG) formats, which means your art won’t pixelate when scaled up, unlike raster/bitmap images. Wikipedia

For Cricut and other cutting machines, SVGs are the gold standard—clean lines, unlimited scaling, and perfect for cutting. Many Inkscape tutorials exist, but this one is built especially for Cricut users with no prior design background.
Some highlights of Inkscape for crafters:
- Works on macOS and Windows (and Linux)
- Lets you draw vectors, edit paths, tweak nodes, and more
- Huge community support and free add-ons
- It uses plain SVG files as its native format
Find more of my Inkscape Beginner tutorials here.
Downloading & Setting Up Inkscape 1.4.2 on macOS
- Download Inkscape from the official site. Choose the macOS version for either Intel or Apple Silicon. If you have a PC you will choose the Windows download.
inkscape-manuals.readthedocs.io+2Wikipedia+2 - Open the
.dmgand drag the Inkscape icon into your Applications folder.
inkscape-manuals.readthedocs.io+1 - Launch Inkscape. On first launch it may take a moment as fonts load.
- Adjust settings:
- Open File → Document Properties to set canvas size, units, background color, etc.
- In Preferences, you can tweak keyboard shortcuts, default zoom, and more.
- Familiarize yourself with the main interface: left toolbar, top tool controls, right panels, and the menu bar (Help, View, etc.).
- Start a new document. Use a white or transparent background (your choice). Save immediately with a name you’ll remember.

Inkscape Beginners: Basic Tools You Need to Know Tutorial
To begin your Inkscape journey, here are the key tools and concepts:
- Select tool: Use it to move, rotate, scale, or select objects. A selected object shows bounding boxes and handles.
- Text tool: For adding text. Later you can convert text to paths, but for now you can experiment.
- Shape tools: Rectangle, Ellipse (circle), Star/Polygon. Great for building base shapes.
- Node tool: After converting shape to a path, this lets you drag nodes, add or delete them, change curves, etc.
- Freehand drawing / freehand vectors: Use the pencil or pen tool for organic shapes.
- Pen / Bezier tool: For straight or curved segments you draw point by point.
- Useful keyboard shortcuts: e.g.
Cmd + Dto duplicate,Deleteto remove,Ctrl / Cmdfor constrained moves.
Every tool has a tool controls row at the top that changes based on the active tool. Play around—hover over buttons, see what each does. That’s part of the fun.
Your First SVG Project: Make a Mushroom (Step-By-Step)
Let’s turn theory into practice. Follow along to build your first SVG mushroom.

Draw the Cap
- Select the Ellipse / Circle tool, click and drag to draw a circle.
- Hold
Cmdwhile dragging to constrain proportions (perfect circle). - With it selected, go to Path → Object to Path to convert the circle to a path, making it editable.
- Switch to the Node tool. Delete a bottom node to flatten the cap.
- Adjust control handles to shape it into a mushroom top.
Draw the Stem
- Use the Rectangle tool to draw a vertical rectangle beneath the cap.
- With rectangle selected, adjust corner radii (with handles) to make the corners slightly rounded.
- Convert the rectangle to a path (Path → Object to Path). Use the Node tool to adjust the shape (drag nodes in/out).
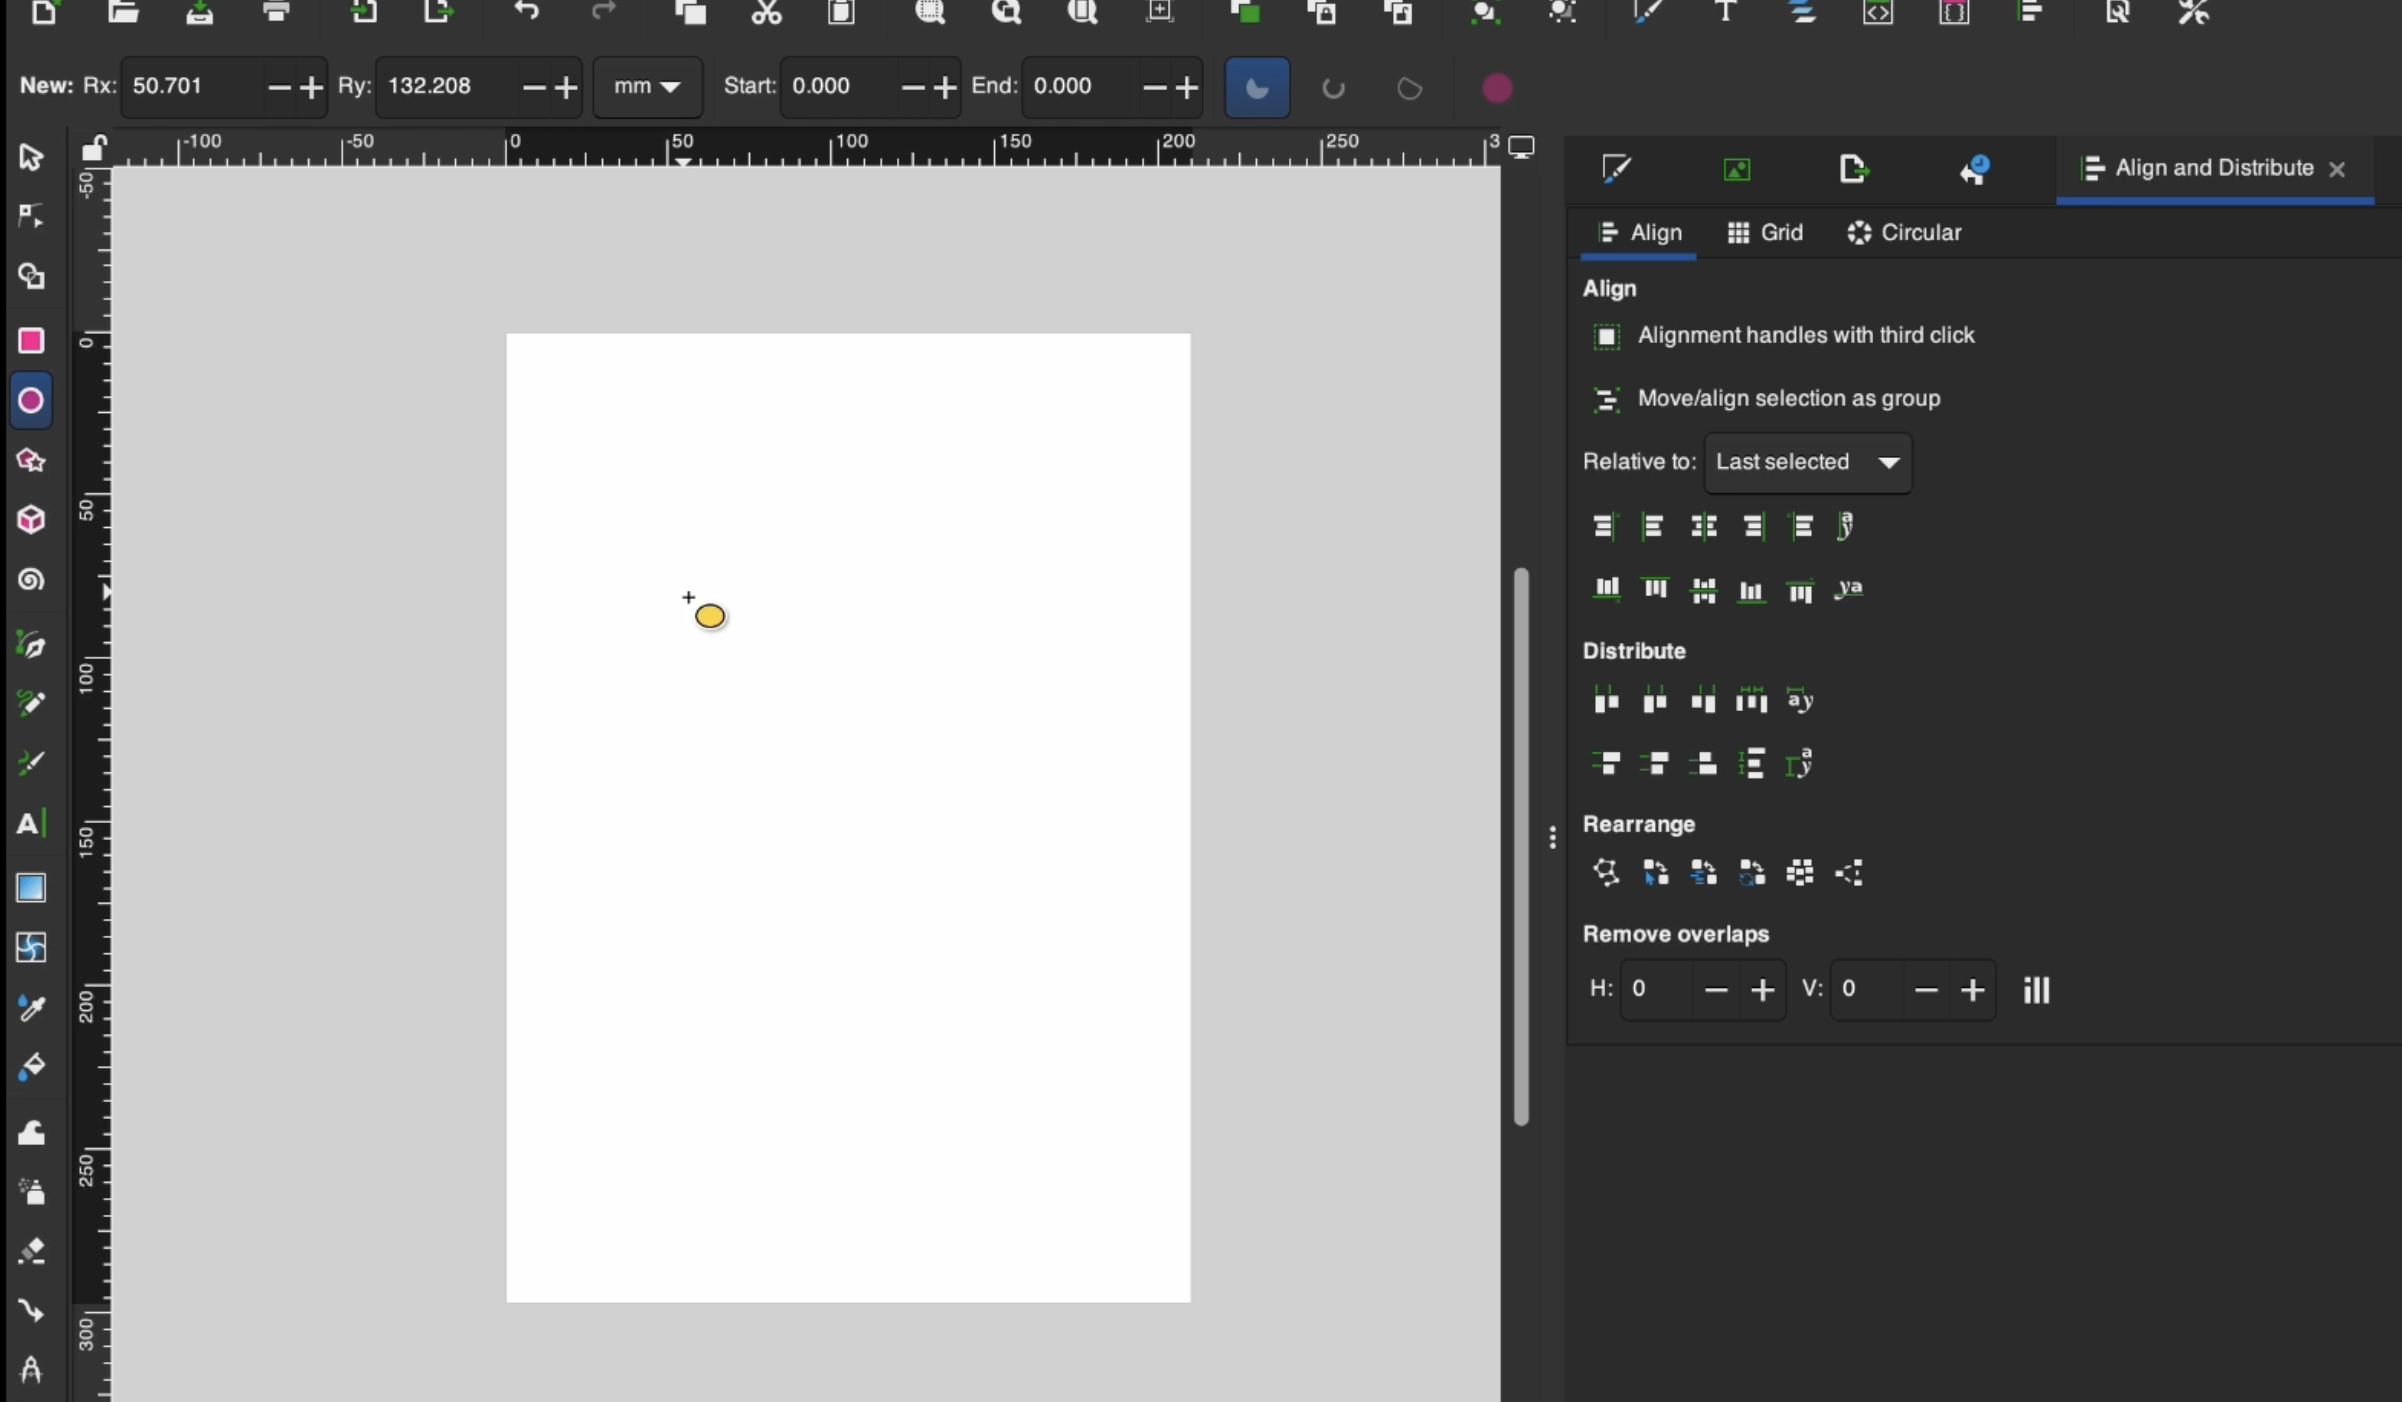
Align & Center
- Select both cap and stem.
- Open Object → Align and Distribute panel, choose “Center on vertical axis” and other alignment options to center them.
- If snapping options are on, things will align more easily; you can toggle snapping on/off in the top-right area.
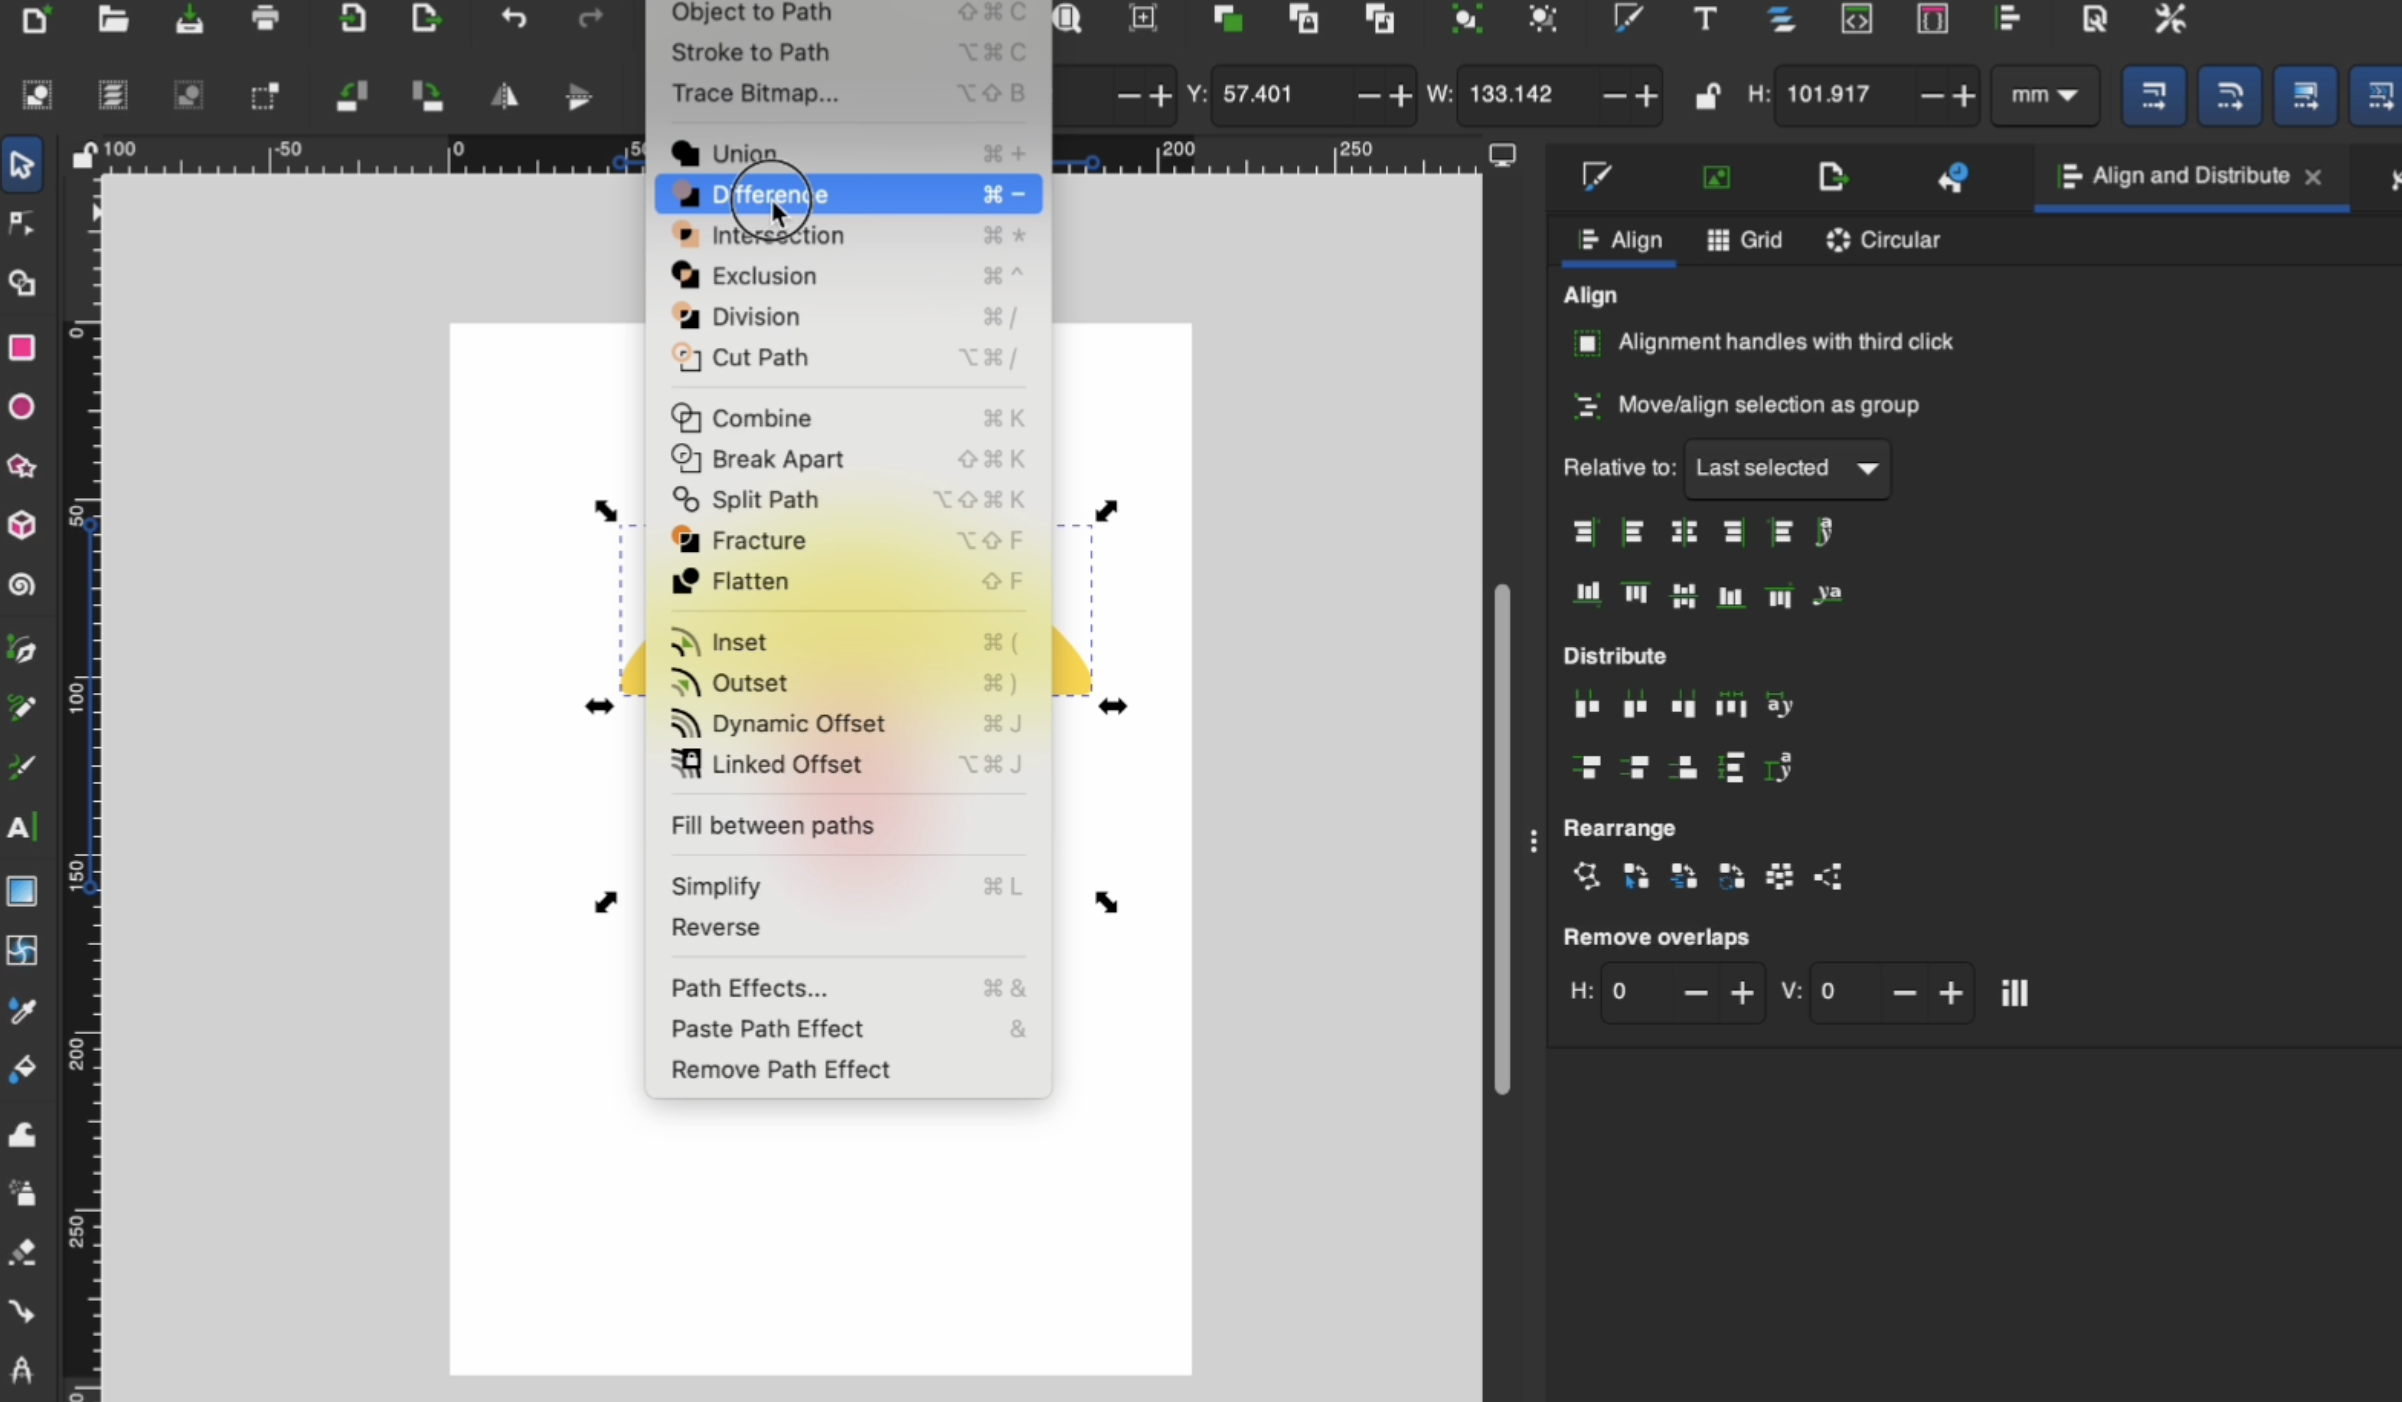
Remove Overlapping Parts
- Suppose the cap overlaps the stem. Duplicate one shape (
Cmd + D) and ensure proper order (Object → Raise/Lower). - Use Path → Difference to subtract overlapping areas so there’s no awkward cut line.
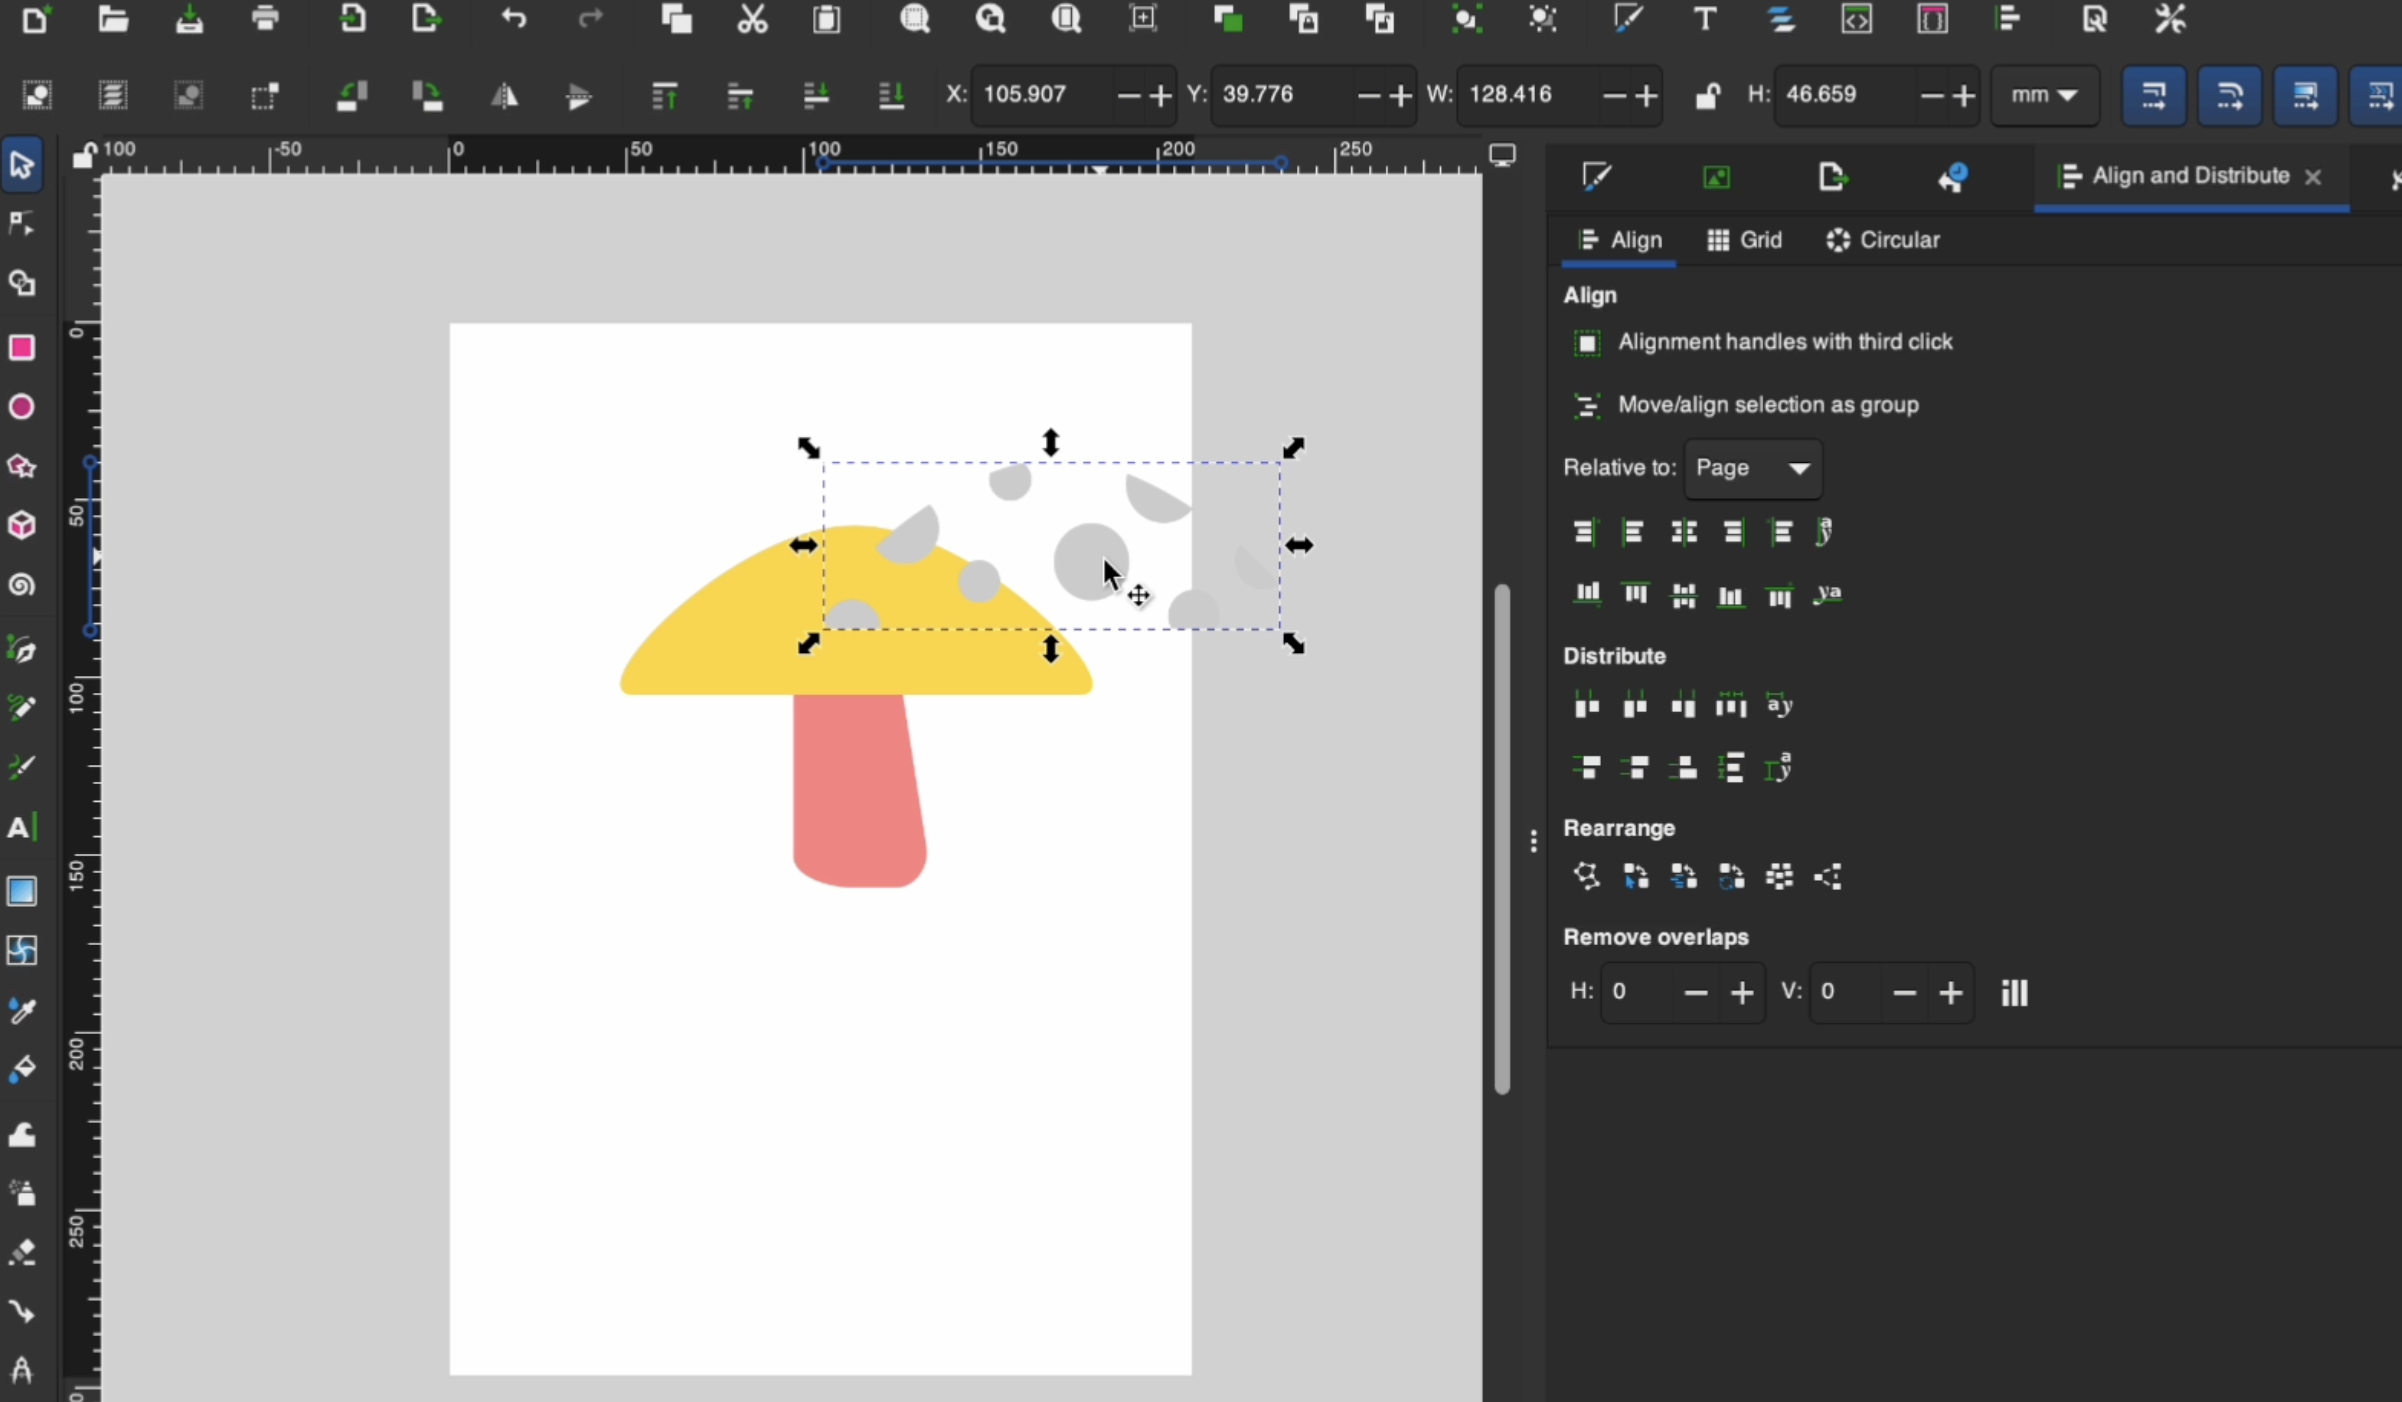
Add Spots
- Draw small circles using the Circle tool.
- Duplicate (
Cmd + D) and reposition spots. - Select the spots, then Path → Union to combine them.
- With the spot union and duplicated cap selected, do Path → Intersection to keep only the parts overlapping.

Color & Tidy Up
- With Select tool, pick colors from the bottom palette or use Fill & Stroke dialog.
- Zoom in and use the Node tool to remove extra nodes or clean up edges.
- Make sure there are no stray nodes or tiny bits you don’t want.
Fix Broken Paths
- If lines appear or your SVG result shows weird artifacts (just like in your video !), go back and select the problem shapes.
- Use Path → Object to Path or Path → Intersect to simplify and unify shapes.
- Re-export and test.
Final Save & Export
- Save your working file (
.svg). - In the Document Properties, set your desired size (inches or mm) and lock aspect ratio.
- Use File → Save As, choose Plain SVG for best compatibility.
- Optionally export to PNG or PDF as needed.
And voilà: you have a cute mushroom vector design, ready to upload to Cricut or use elsewhere.

Export Options & File Types for Cricut
To make your SVG usable in Cricut Design Space:
- Save as plain SVG files so they’re clean, minimal, and compatible.
- Keep aspect ratio locked so your design doesn’t distort.
- If you want print then cut images, export PNG.
- Use the smallest file size possible, avoid unnecessary nodes, layers, or objects.
- If you see weird cut lines in Cricut, that often means overlapping shapes or hidden paths; go back and fix with path operations.
You now know how to manage various formats and ensure your vector path is clean enough to cut.

Real Uses for Your SVG Creations
Now that you’ve made your first SVG, what can you do with it?
- Cut vinyl, iron-on, paper, felt, or even wood with your cutting machine
- Layer multiple SVG elements for dimensional designs
- Use your vector art for stickers, labels, printables, or digital planners
- Sell or share your designs – you can become a Cricut Contributing Artist, sell on Etsy, or have a free SVG blog like mine!
Your new creative potential is unlimited.
Best Ways to Learn More Inkscape
To grow from beginner to confident:
- Watch a video tutorial on Inkscape – I have a few more tutorials here for you!
- Explore advanced features: stroke dialog, brush strokes, text effects, pie chart tool, etc.
- Try combining regular shapes, freehand lines, and custom paths in new projects.
Get Access to the Free SVG Vault
Want more designs to craft with? Sign up for my newsletter! This is where I will be housing my free Mushroom SVG files that I created on Inkscape! Design Number #203
When you subscribe, you’ll receive an email (takes 5–10 minutes) with the password to enter my exclusive Community SVG vault.
Congratulations! You’ve just completed your very first Inkscape beginner tutorial. You designed a mushroom SVG from scratch. You now know the essential tools (select tool, node tool, shape tools, etc.), how to align and edit objects, how to export, and how to troubleshoot broken lines.
Give yourself a pat on the back. Keep experimenting, draw simple shapes, tinker with nodes, play with colors; and the tools will start feeling natural.
If you enjoyed this, join my community, use those free SVGs, and share your creations with me. I can’t wait to see what you make next.
Stay crafty! ✂️🖤