Siser Easy Puff Glitter Review + Free Showgirl SVG Files
If you’ve been curious about the brand-new Siser Easy Puff Glitter, you’re in the right place. I’ve tested it out in my craft room, tried it with different presses, and I’m here to give you the real scoop: trial, error, and all. Plus, I designed some fun Showgirl SVG files that you can grab for free in my Community Vault at the end of this post.
Let’s dive into this sparkly, puffy vinyl and see if it lives up to the hype. And if you’re looking to purchase the Puff HTV grab some here!

This blog contains affiliate links, please read my full disclosure here.
Colors and First Impressions
When Siser released this new line, they sent me a sampler sheet with all the colors, and they’re bold and fun. The lineup includes gray, black, orange, lime green, bubblegum pink, burgundy red, lavender, and blue.
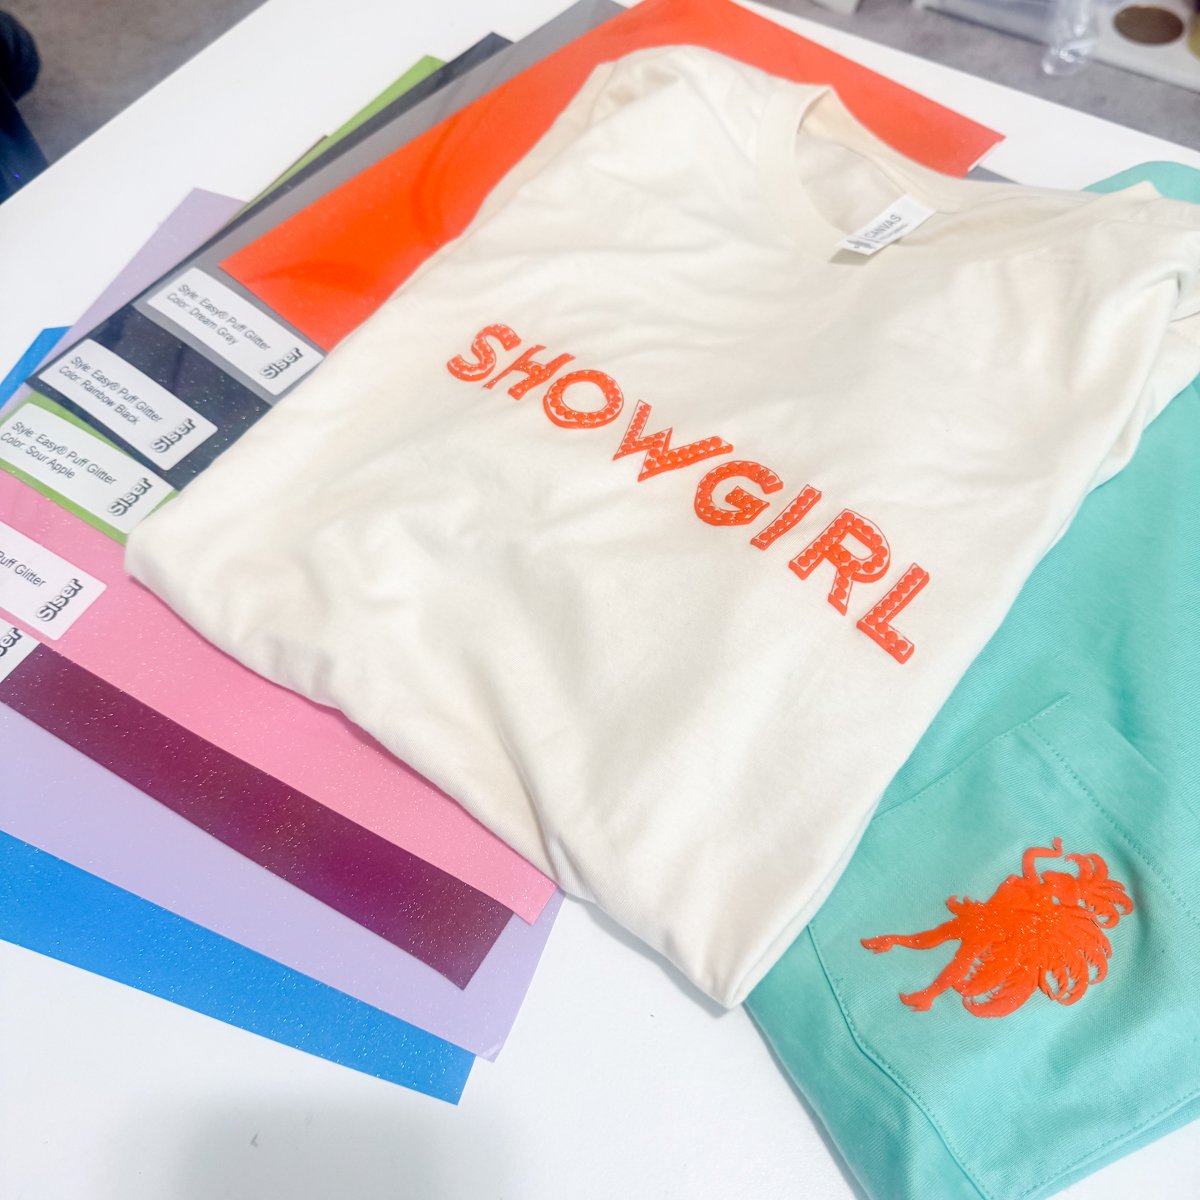
The first thing I noticed was the thickness. This definitely feels like a heavier material. The unique texture stands out right away, and I was excited to see how the puff effect would change the finished look.
For cutting, the recommended setting is Cricut’s “Glitter Mesh” iron-on. I cut twice to make sure it went all the way through. This step is key when working with special materials like puff vinyl because the 3-D appearance depends on clean cuts.
Cutting and Weeding Experience
Now let’s talk about weeding. At first, I struggled. Once I started to pull quickly, the weeding went much smoother.

The pressure-sensitive carrier definitely helps with smaller details, but I’d suggest sticking with large elements or simple shapes for your first projects. The material doesn’t tear easily, but working with delicate designs can be tricky.
Heat Application Tests
This is where things got interesting. I tested the Siser Easy Puff Glitter with different tools: my mini press and my auto heat press.

Using a Mini Press
I set the temperature to 310°F and pressed for about 3 seconds. The directions say warm or cold peel, but my first attempt lifted the design with the carrier. I ended up pressing for an additional 5 seconds and then peeling. I then went through and pressed again with the Teflon sheet at a medium-high pressure. The easy puff is a two-step process.
Auto Heat Press with Wood Panel

Next up, I tried my auto press with a thin piece of wood underneath for firm pressure. The instructions said 2–3 seconds for the first press, but honestly, that wasn’t enough. My circles weren’t sticking at all. Once I bumped it up to 5 seconds, they adhered much better.

On the second press (10–15 seconds at 310°F), I expected a nice 3-D effect, but it came out flat. No puff at all. It still looked clean, no wrinkling or “brainy” look like some other puff vinyls, but it definitely lacked the textured look I wanted. Finally, I went back to basics with my small press, working in sections. This time I pressed 20–30 seconds at medium to light pressure. The results were much better. The O and R in my “Showgirl” design puffed beautifully, while other areas needed a second round of heat.
The takeaway? Trial and error is part of the process with this unique HTV. It’s forgiving, so if you don’t get the puff you want the first time, you can go back with more heat.
Troubleshooting Tips

Since I hit a few snags, I thought it would help to share some troubleshooting advice:
- Press longer on the first round. Instead of 2–3 seconds, go closer to 5.
- Try removing the Teflon sheet. Direct heat gave me more consistent puff results.
- Use light to medium pressure. Too much pressure can flatten the puff effect.
- Expect variation. Different presses give different results, your home small iron might puff better than an auto press. I don’t have a manual press so I can’t say if that would work best.
- Keep experimenting. The forgiving formula means you can always go back for “next time” adjustments.
With a little patience, you’ll unlock that bold style this HTV is known for.
Final Thoughts
After playing with the Siser Easy Puff Glitter, here’s my verdict: it’s durable, forgiving, and offers a fun way to add dimension to your designs. While it can be fussy about time, temperature, and pressure, I actually like that it doesn’t wrinkle or distort when reheated.
If you’re into a unique texture with a clean 3-D appearance, this is worth adding to your craft stash. I think it shines best on large elements or designs with a lot of negative space, where the puff can really show.
It may not be the easiest HTV I’ve ever used, but it definitely delivers a textured look that feels special.
Free Showgirl SVG Files
To celebrate this glittery release (and the Life of a Showgirl release), I designed some free Showgirl SVGs you can use to test out the puff for yourself! These files are exclusive to my Community Vault. All you need is an email address to unlock the freebies.

👉 Sign up for my Community Vault below and get access to the Showgirl designs (Design Number #202 Showgirl SVGs), plus hundreds more free SVGs. Please be patient if first signing up, the password should arrive in your email in 5-10 minutes. Please check spam and promotions. I send the password in every email.

I’d love to see how you use these designs with glitter Siser HTV or any other vinyls in your stash. Tag me on social or send me a message with your creations.


where can I find the community vault box to put the code in?
https://dinosaurmama.com/community-members-only-svgs/
Thank you!