Cricut Design Space for iPad: June 2026 Update
Last week, I shared a walkthrough of the latest Cricut Design Space update for desktop users. After publishing that post, I got a lot of questions from iPad users asking where all of those same tools and functions are located in the iPad version of Design Space.
So, I updated my iPad to the newest version of Cricut Design Space and spent some time digging through all the menus.
The good news? Almost everything from the desktop version is still there.
The bad news? Some things are hidden in different places, and there is one feature they do not have on the iPad version.
If you’ve been watching Cricut tutorials on YouTube and wondering why your screen looks completely different, this guide is for you.

Starting a New Project on iPad
To start a new project, tap the plus sign in the bottom right corner and choose a blank canvas. You won’t see any tools until you add something to the canvas.
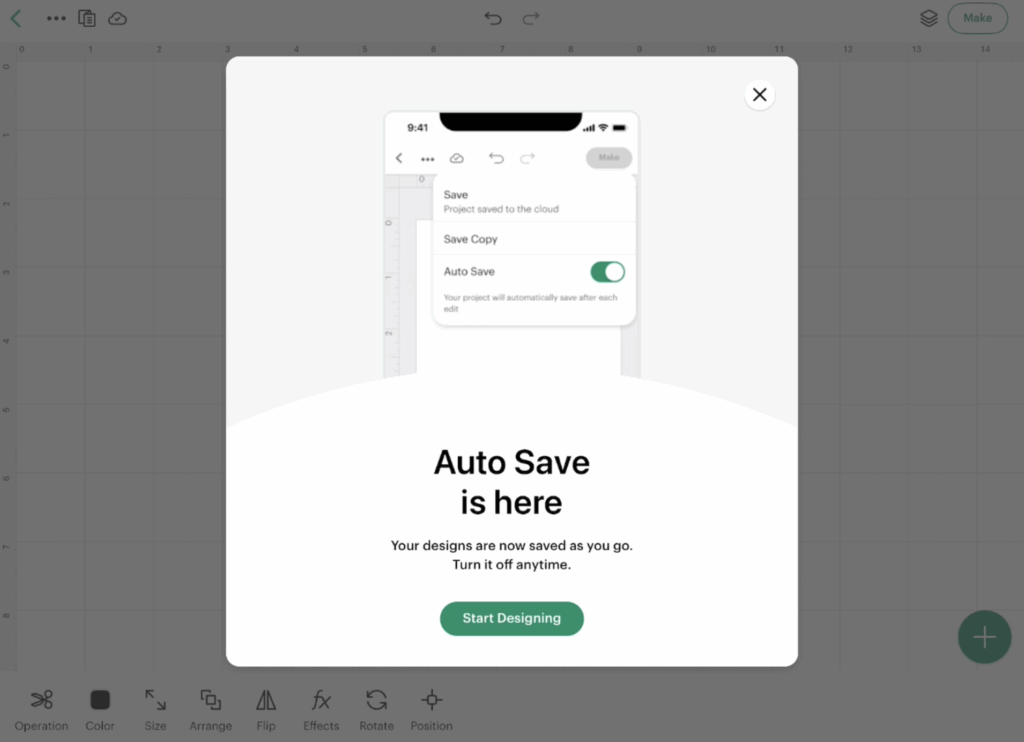
One thing I noticed immediately after updating was the new Auto Save notification. Cricut now automatically saves your projects as you work. If you don’t want that feature enabled, you can turn it off, but it is nice to have if you’re someone who forgets to save projects manually. However, I have heard that autosave is everytime you move ANYTHING and can delay you moving on with your project quickly.
Working with Shapes
I always like to start with a simple shape when I’m exploring updates, so I added a heart to my canvas.
Once a shape is selected, you’ll see several options appear along the bottom of your screen.
Operation
The Operation menu is located on the left side of the toolbar.
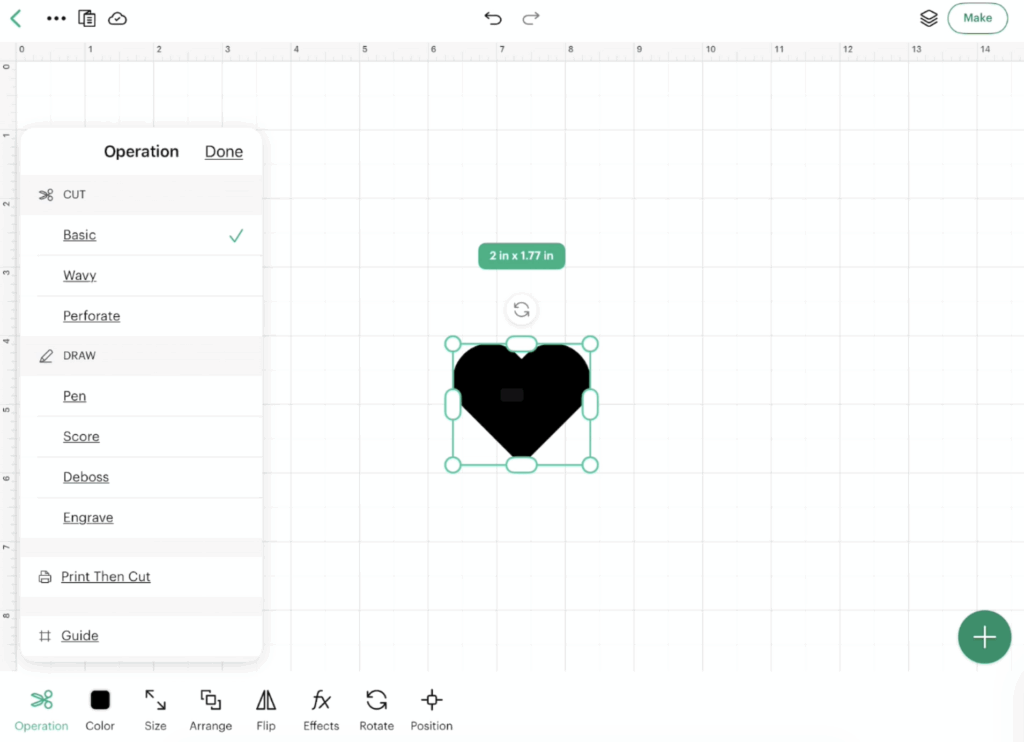
Just like the desktop version, the options you see here depend on your machine. Since I connected my Cricut Maker 4, I can see all available operation types. If you’re using a Cricut Explore or Cricut Joy, your menu may look a little different.
Color
Next to Operation is the Color menu.
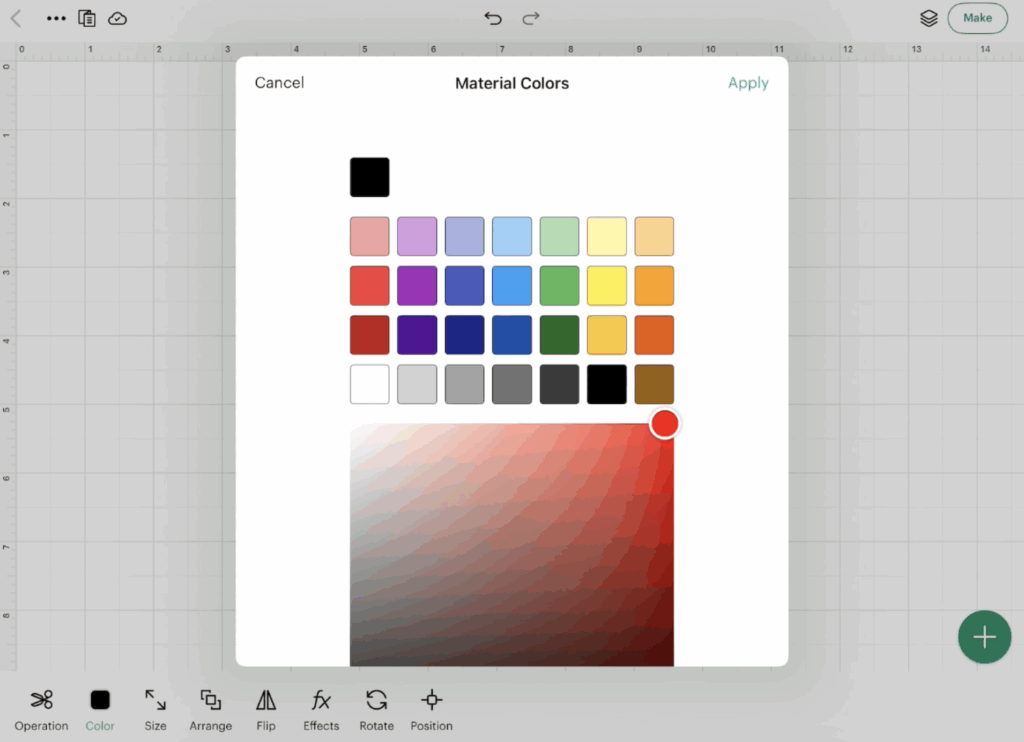
You can change colors, enter a hex code, and apply the changes just like you can on desktop. One difference I noticed is that you have to tap Apply before your color changes take effect. You cannot simply click on the outside of the color pop out.
Size
The Size panel works similarly to desktop Design Space, but honestly, I think the iPad version is a little easier to use. I like the slide adjustment to make changes.
Arrange
If you’re working with multiple objects, Arrange lets you send items forward, backward, to the front, or to the back. Say you have 2+ objects on the canvas. You click on just one and move it up and down with the different options.
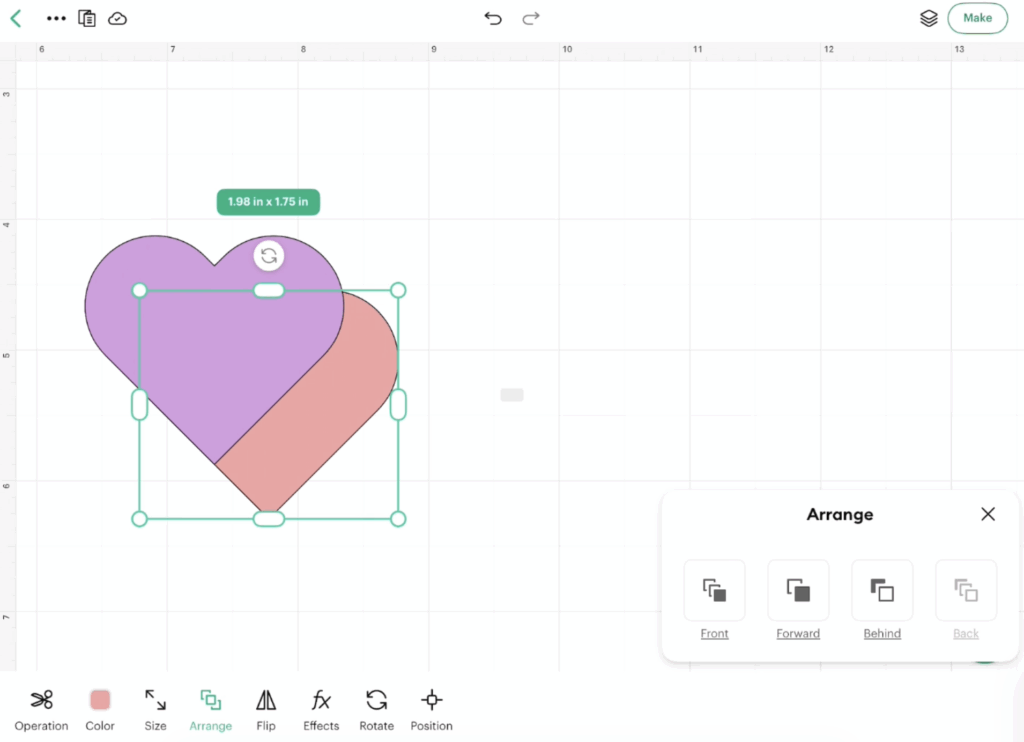
This works exactly like the desktop version.
Align
The Align menu only appears when multiple objects are selected.
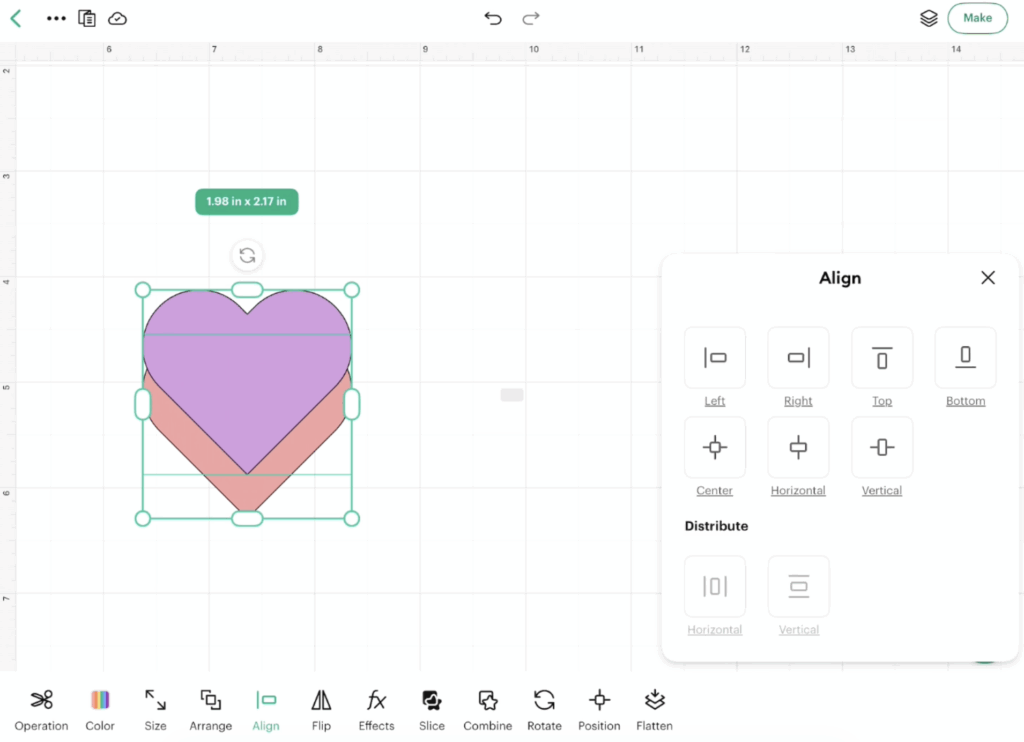
Here you’ll find:
- Align Left
- Align Right
- Align Top
- Align Bottom
- Center Horizontally
- Center Vertically
- Distribute options
If you’re not seeing Align, make sure you’ve selected more than one object. To select more than one, I put my finger slightly over the first object and slid it over all the objects I wanted to include.
Flip and Rotate
Both Flip Horizontal and Flip Vertical are available on iPad.
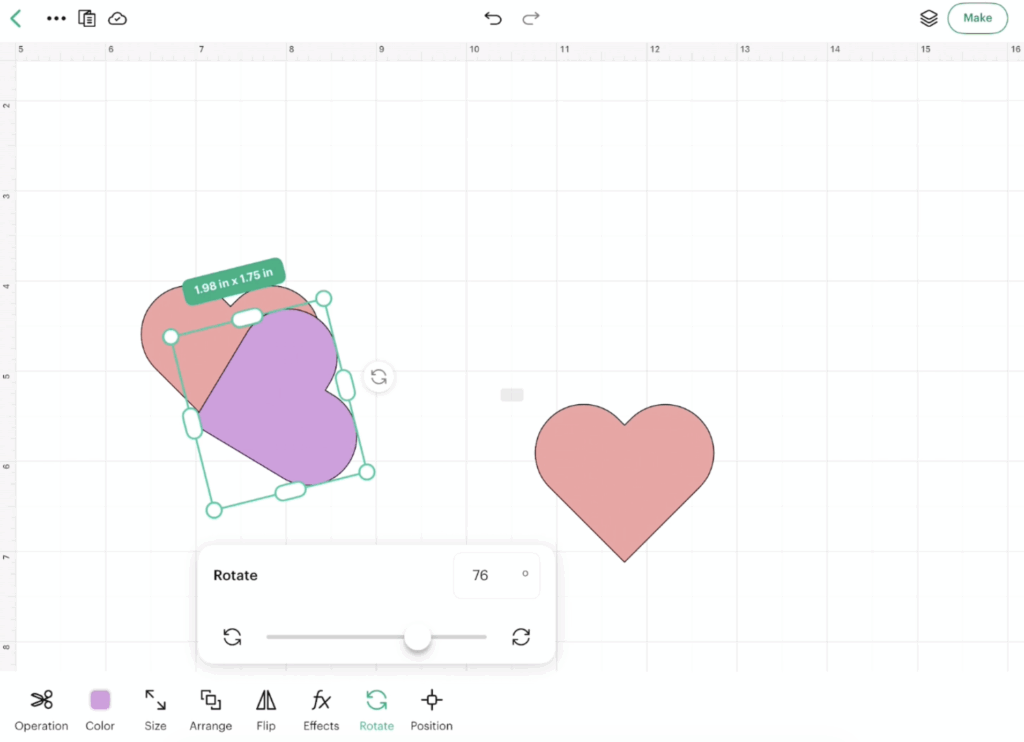
You can also rotate objects using the Rotate tool or by dragging the rotation handle directly on the design.
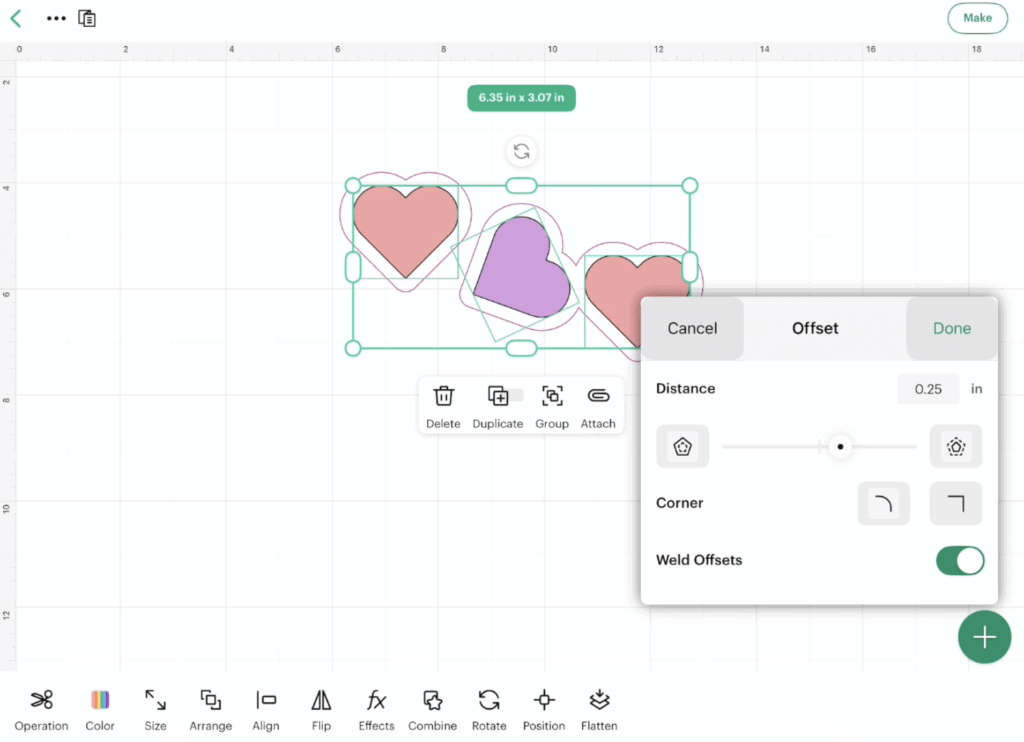
Finding Effects on iPad
One area that confuses a lot of users is the Effects menu.

Thankfully, Cricut kept most of these features on iPad.
Inside Effects you’ll find:
- Offset
- Create Sticker
- Warp
If you’re looking for Warp and can’t find it, make sure you’re checking the Effects menu.
The Combine Panel
This was one area I specifically wanted to test because it moved around a bit in recent Design Space updates.
The Combine Panel is available on iPad, but you’ll need at least two objects selected before it appears.
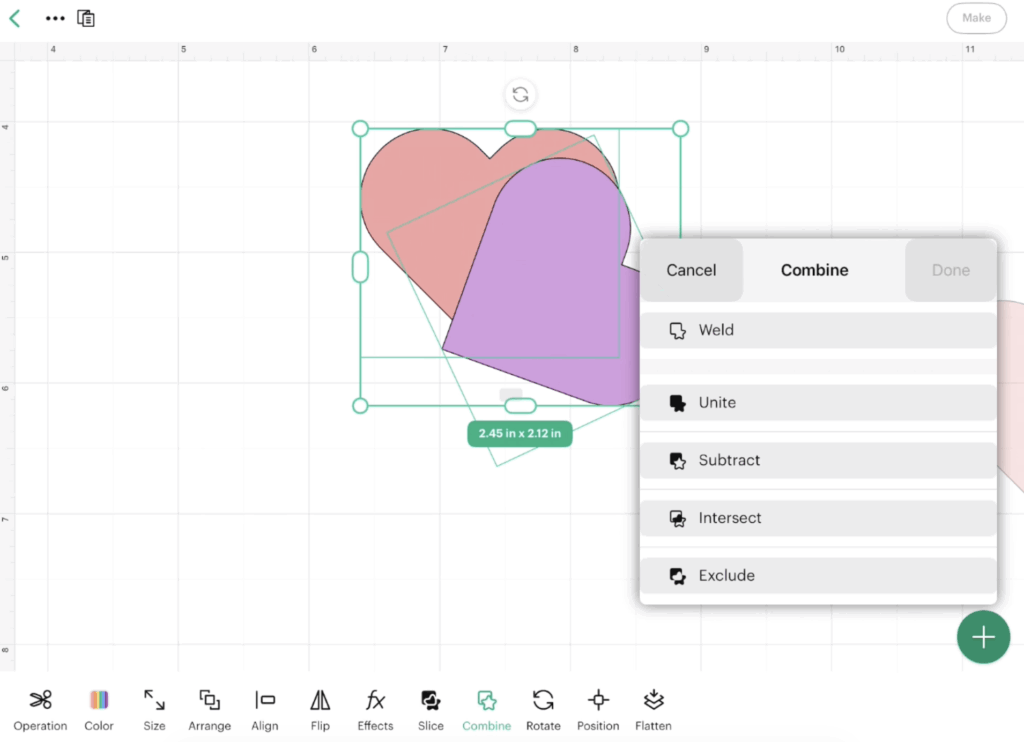
Inside you’ll find:
- Weld
- Unite
- Subtract
- Intersect
- Exclude
You’ll also see Slice become available when multiple layers are selected.
If you don’t see these options, try selecting two shapes or text first.
Working with Text on iPad
Text tools are actually very easy to find once you know where to look.
After adding text to your canvas, you’ll see a new set of options along the bottom toolbar.
Font Selection
You can access both Cricut fonts and system fonts installed on your iPad.
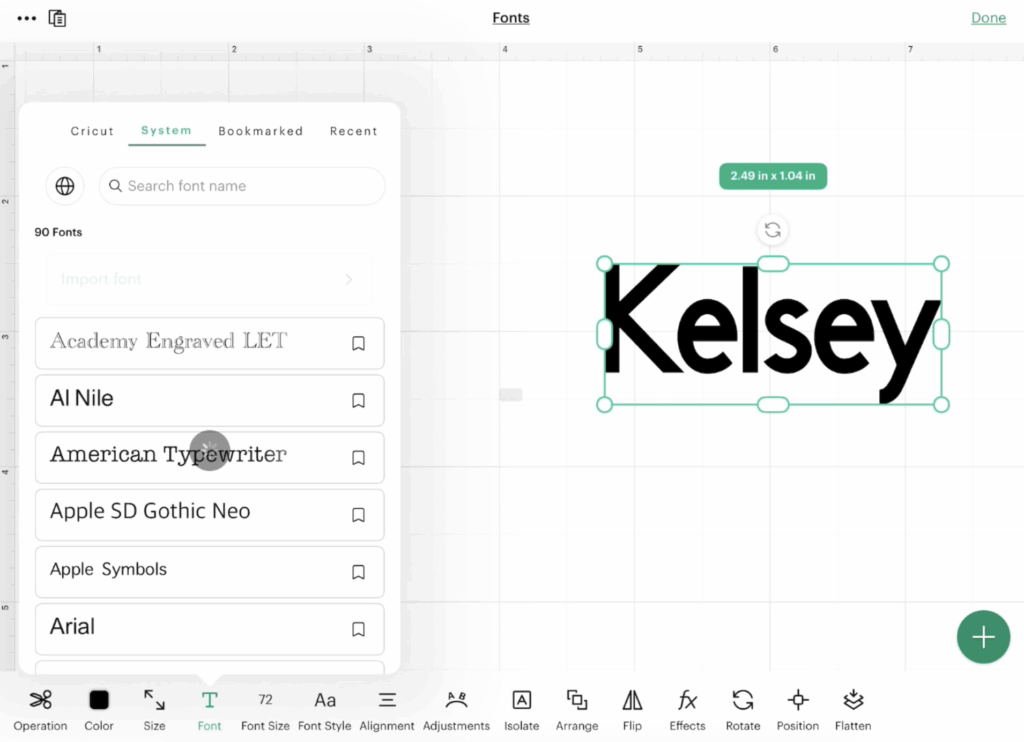
One thing worth mentioning is that installing fonts on an iPad is possible, but it isn’t nearly as simple as installing fonts on a desktop computer. You will need an outside app to do so.
Font Size
The Font Size setting changes the actual size of your text.
Unlike some design programs where font size only affects appearance, changing the number here physically changes the dimensions of your design.
Font Styles
Bold, Italic, and other available font styles are located in the Font Style menu. Not all fonts will have this available.
Alignment and Wrap Text
Text alignment options are available just like they are on desktop.
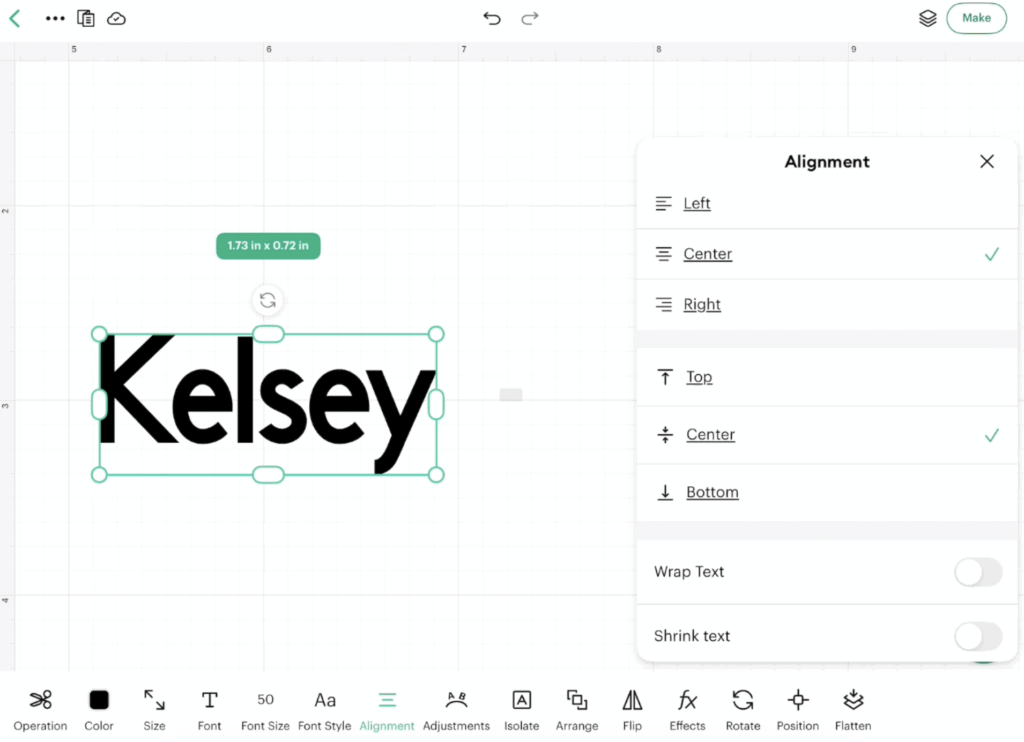
You’ll also find Wrap Text, which controls how text behaves inside a text box.
This is especially useful when creating longer text designs.
Adjustments: Curve, Kerning, and Line Spacing
One thing I found interesting is that Cricut organized some tools differently on iPad.
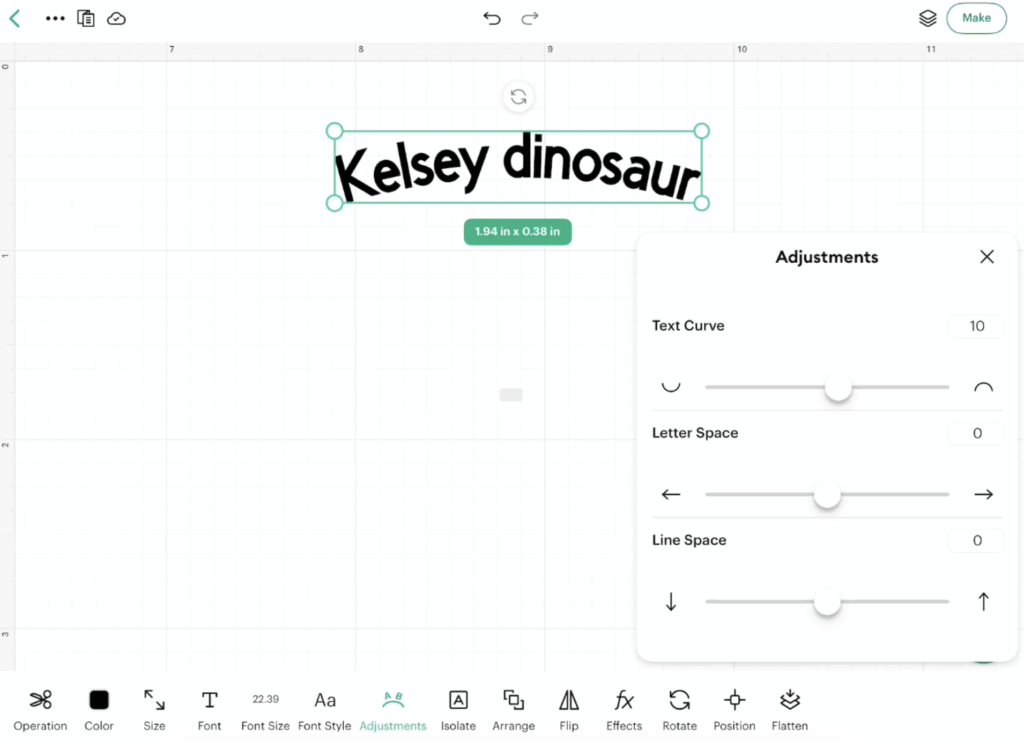
For example, Curve Text is located under Adjustments on iPad.
On desktop, Curve Text lives inside the Effects panel.
Inside Adjustments, you’ll find:
- Curve Text
- Letter Spacing (Kerning)
- Line Spacing
So if you’re following a desktop tutorial and someone says “go to Effects,” you may actually need to look under Adjustments instead.
What You Can Do on iPad That You Can’t Do on Desktop
This section surprised me.
Usually, desktop software gets all the extra features, but there are actually a couple of things I noticed on iPad that aren’t available on desktop.
Shrink Text
This was completely new to me.
Shrink Text lets you lock the width of your text area while automatically reducing the font size as additional text is added.
When I checked my desktop version of Cricut Design Space, I couldn’t find this feature there.
It’s actually pretty handy if you’re trying to fit text into a specific space.
SnapMat
If you’ve used Cricut for a while, you’ve probably heard of SnapMat.
This feature allows you to take a photo of your mat using your device’s camera and place designs exactly where you want them.
SnapMat is available on mobile devices like iPads and iPhones, but is not available in the desktop version of Cricut Design Space.
What You Still Can’t Do on Cricut Design Space for iPad
After going through every menu I could find, there was one major feature that still appears to be missing.
Pattern Fill Uploads
As of this update, I still could not find a way to upload custom pattern fills from an iPad.
You can use colors and other design options, but custom pattern uploads still appear to be limited to Mac and Windows computers.
Hopefully, Cricut changes this in a future update because it would make the iPad version much more powerful.
Final Thoughts
Overall, I was pleasantly surprised by how much functionality is available in Cricut Design Space for iPad. However, I will say my iPad is old and was running relatively slow.
Almost every feature I covered in my desktop update is available somewhere on the iPad version. The biggest challenge is simply knowing where Cricut decided to place everything.
If you’re coming from desktop tutorials, remember that some tools may be organized differently, especially things like Curve Text and the Combine Panel.
The good news is that once you know where everything lives, creating projects on an iPad is actually pretty straightforward.
If Cricut releases additional updates, I’ll continue testing them and sharing what I find.
If you’d like to stay up to date on Cricut Design Space changes, free SVG files, and beginner Cricut tutorials, be sure to join my newsletter. You’ll be the first to know about new updates, tutorials, and freebies as they’re released.


