Engrave a Cake Server with Cricut | Step by Step Tutorial
If you’re looking for an easy but impressive Cricut DIY project, learning how to engrave a cake server with Cricut is a great place to start. This project looks high-end, makes an amazing gift, and is surprisingly beginner friendly once you understand the setup.

In this tutorial, I’ll walk you step by step through engraving a cake server using the Cricut Maker, the engraving tip, and Cricut Design Space.
What You Need to Engrave a Cake Server
Before opening the Cricut design software, gather your supplies. Using the best materials makes engraving metal serving ware pieces much easier and more consistent.
This blog contains affiliate links, please read my full disclosure here.
Supplies:
- Cricut Maker – you can use an Explore with a hack and an offbrand engraving tool (I will talk about this more below)
- Cricut engraving tip
- StandardGrip or StrongGrip mat (new or very sticky)
- Metal cake server
- Painter’s tape
Why Engraving Cake Servers Is Different
Cake servers are shaped differently than flat blanks or cookie spatulas. The handle extends beyond the engraved area, which means placement matters more than usual.
If the handle slides underneath the roller bar while feeding into your Cricut machine, it can jam the machine or cause damage. To engrave safely, the engraved area must stay within the main content area of the mat while the handle hangs off the bottom edge.
Once you understand this, engraving cake knives and cake servers becomes straightforward.
Step 1: Upload and Resize Your Engraving Design
Open Cricut Design Space and upload your engraving design. You can use a monogram, wedding design, or one of the free downloads available on my blog. (I have a bunch listed below).
Measure your cake server before resizing. My server measured:
- 2.5 inches wide at the widest point
- About ½ inch at the narrowest point
- Roughly 4.5 inches long
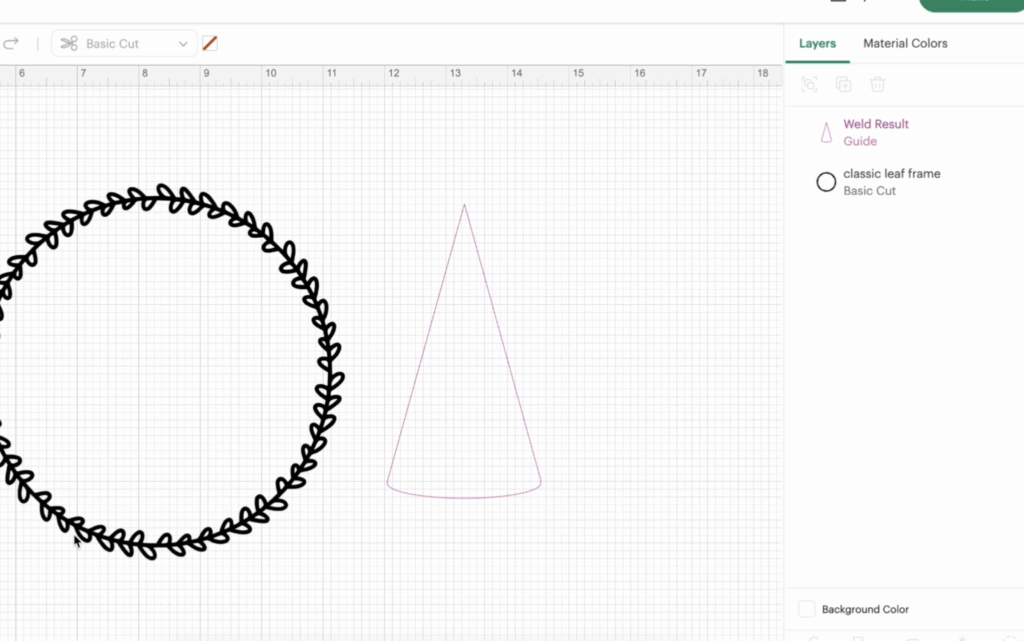
Because cake servers taper, creating a visual guide helps. From the open menu, add a triangle shape and resize it to match your server dimensions. You can add a small circle to soften the top edge if needed, then weld the shapes together.
Change this shape from Basic Cut to Guide. This keeps it visible on the canvas but prevents cutting or engraving.
Step 2: Add Text or Monogram Details
From the user menu, add a text box and type your initial or design text. Thin fonts work especially well for engraving designs, but thicker fonts can also be used for bolder results.
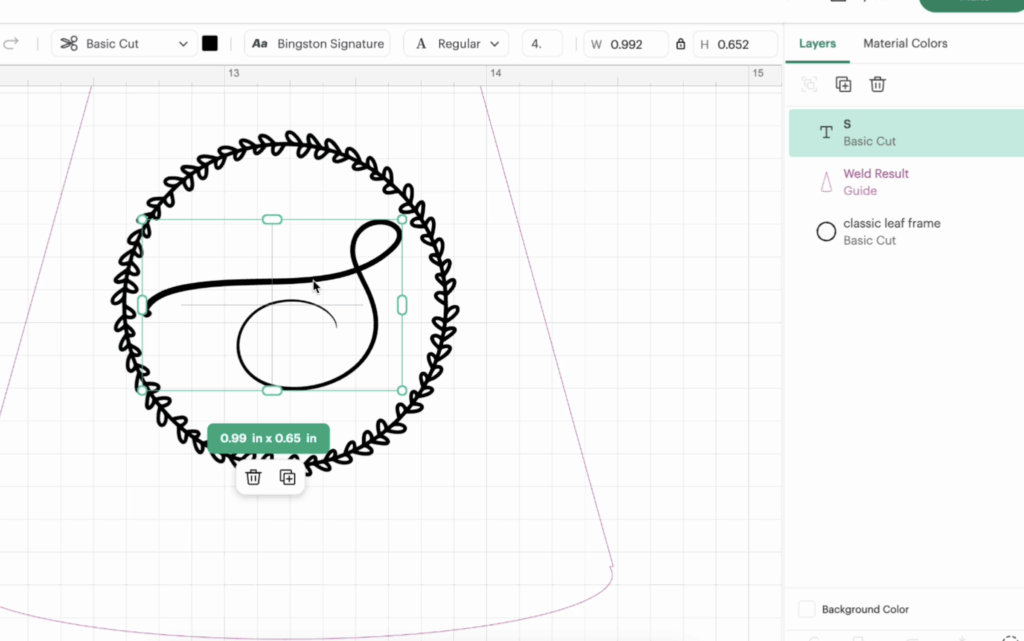
Once everything looks correct:
- Select the design and text
- Click Attach
- Change the operation from Basic Cut to Engrave

Step 3: Position the Design on the Mat
Click Make It to move to the next screen. Your guide shape will disappear, leaving only the engraving design.

Move the design as far down the mat as possible. Do not place it in the top corner. The cake server handle must hang off the bottom of the mat so it never passes under the roller bar.
This placement ensures the Cricut machine can feed the mat in and out safely.
Step 4: Select Material Settings
From the open settings menu, click Browse All Materials. Navigate to:
- Foil
- Metal
- Stainless Steel
Even if your cake server isn’t stainless steel, this setting works well for engraving. Confirm your material and ensure the Cricut engraving tip is installed correctly.
Step 5: Secure the Cake Server to the Mat
Place the cake server directly over the engraving placement lines shown in Cricut Design Space. Use painter’s tape to secure it firmly, avoiding the engraving area.
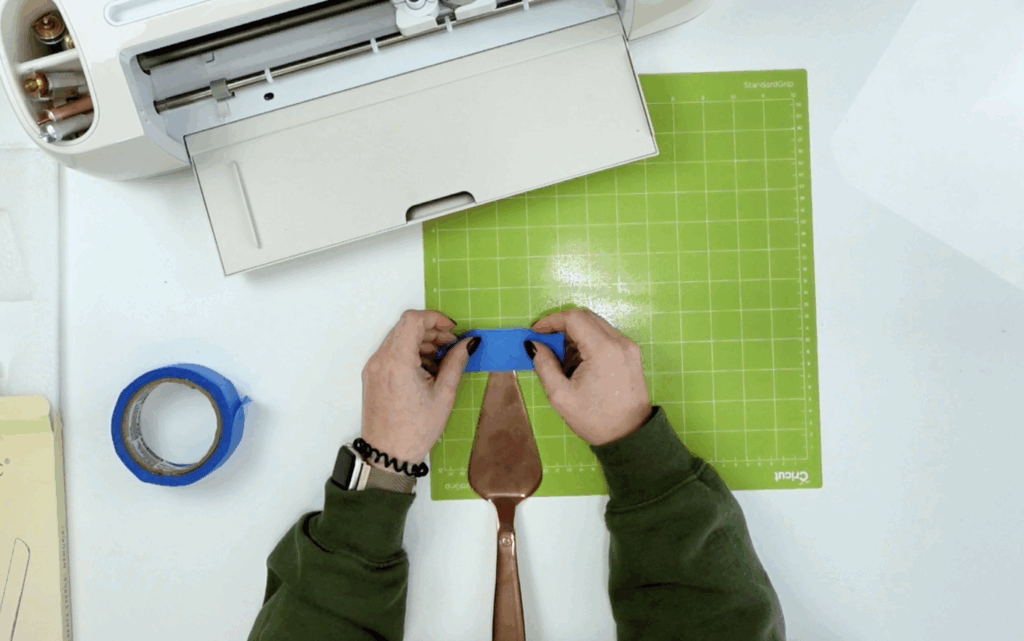
Because serving ware pieces are heavier than vinyl or cardstock:
- Tape the sides
- Tape near the base
- Prevent any movement or lifting
A strong grip mat helps, but painter’s tape is essential for stability.
Step 6: Start the Engraving Process
Insert the mat into your Cricut Maker. Lightly support the cake server as the machine pulls the mat in. This prevents tipping until the mat is fully loaded.

The machine may pull the mat in, push it back out briefly, then begin engraving. This is normal. The engraving process takes about four minutes for a small design.
Step 7: Reveal the Finished Engraving
Once engraving is complete, unload the mat, remove the painter’s tape, and lift the cake server off the mat. If you want deeper engraving, you can press the button again to repeat the pass.

The engraved design will appear subtle on shiny metal but looks clean and professional in person.
Can You Engrave a Cake Server with a Cricut Explore?
Cricut Explore machines do not officially support engraving. However, there is a known workaround that involves placing an engraving blade into the fine-point blade housing and adjusting pressure settings.
I personally have not tested this method yet, so I recommend proceeding with caution. If you’d like me to test it and share whether it’s worth trying, let me know in the comments.
Troubleshooting & Common Mistakes
Design too high on the mat:
This can cause the handle to slide under the roller bar and jam the machine.
Server shifting during engraving:
Use more painter’s tape or switch to a StrongGrip mat.
Engraving looks too light:
Run the engraving a second time without removing the mat.
Design facing the wrong direction:
Double-check rotation before engraving. The design engraves exactly as shown on the mat preview.
Free Engraving Designs & Internal Resources
If you’re looking for engraving designs, I have free downloads available on my blog, including:
Final Thoughts
This is one of my favorite unique Cricut project ideas because it’s quick, meaningful, and affordable. Whether you’re making a wedding cake knife set, a bridal shower gift, or personalized home decor, engraving adds a timeless touch.
Stay crafty!