Valentine Box SVG Free Matchbox Template for Cricut
If you’re looking for a Valentine box SVG free download that’s easy to assemble, beginner-friendly, and endlessly customizable, you’re going to love this matchbox-style Valentine project. These sliding drawer boxes are perfect for Valentine’s Day, but they’re also a great way to package small gifts all year long. From classroom treats to gift cards and candy, this design makes a huge impact with very little effort.

In today’s tutorial, I’m walking you through how to use my Valentine box SVG free matchbox template with your Cricut machine or other cutting machine. I’ll show you how to set up the cut and score lines correctly, how to customize the front of the box, and how to assemble everything step by step. I’m also sharing optional vintage Valentine images you can use with Print Then Cut if you want to dress your boxes up even more.
This project uses a free SVG file from my Community Vault, and you’ll find everything you need linked below.
What You’ll Need to Make This Cricut Valentines Box
Before we jump into Cricut Design Space, let’s talk supplies. These are simple craft projects, and you likely already have most of this on hand. This blog contains affiliate links, you can read my full disclosure here.
Materials
- Cardstock (medium cardstock works best 65-80 lb)
- Optional: glitter card stock for decorative layers or patterned cardstock
- Craft glue (save 10% on Bearly Art with code DINOMAMA), glue stick, hot glue gun, or tape runner
- Optional: ribbon, vinyl, or Cricut pens for personalization
Tools
- Cricut machine (Explore, Maker, or Joy*) or any cutting machine (Silhouette Studio, Brother ScanNCut, etc.)
- Scoring stylus or scoring wheel
- Standard fine-point blade
- Printer (only if using Print Then Cut)
*Print Then Cut versions of this Cricut Valentine’s box cannot be made with the Cricut Joy due to limitations, but basic cut versions work depending on sizing.
This is a great way to use what you already have while still creating polished Valentine boxes.
Uploading the Valentine Box SVG in Cricut Design Space
Open Cricut Design Space and upload the Matchbox SVG (Download #209 found below). Once it’s on your canvas, this is what you’ll notice:
- Two main box pieces
- A black square in the center used for scoring lines
Before cutting, we need to adjust those cut lines.
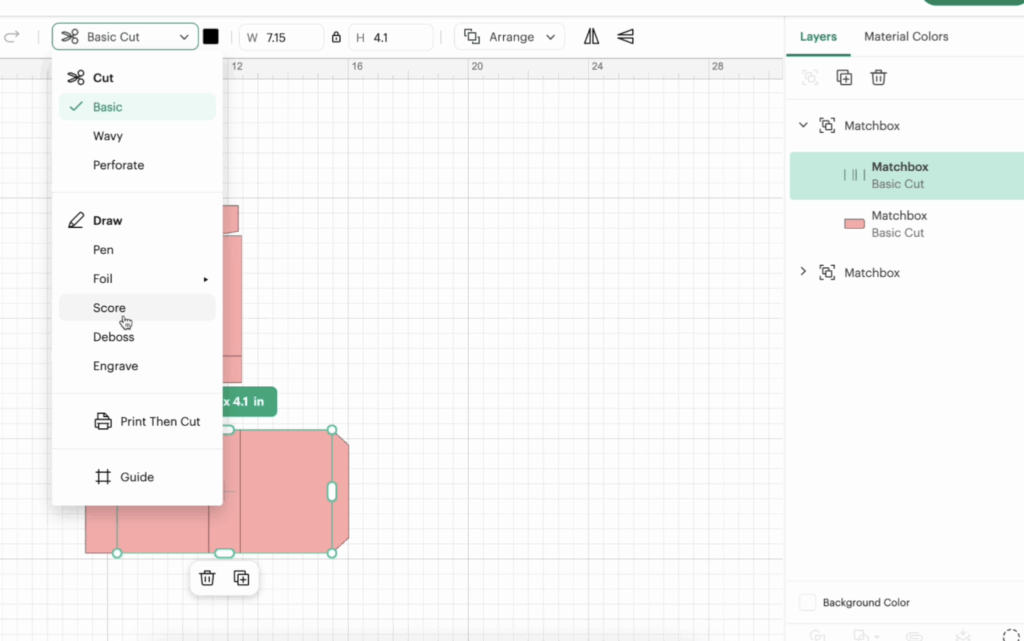
Setting Up Score Lines Correctly
- Ungroup both pieces.
- Select the black square or lines.
- Change the operation from basic cut to score.
- Highlight both the score layer and the base shape.
- Click Attach.
Repeat this process for both box pieces. This ensures your score lines stay aligned when cutting.
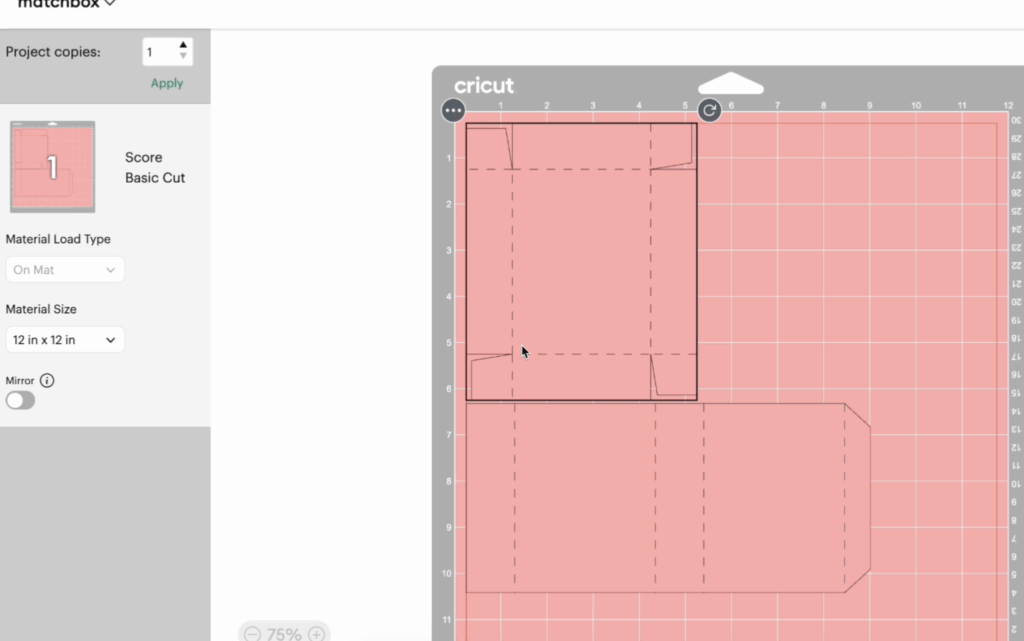
At this point, your Cricut Design Space file is technically ready to cut. The default finished size of this Valentine’s box design is approximately 3” x 4” x 1”, which works perfectly for gift cards, candy, and small gifts.
Optional: Adding Print Then Cut Vintage Images
If you want to customize the front of the box, you can use the vintage images from Download #210. This is a fun way to elevate your Valentine’s Day craft projects.
How to Add Print Then Cut Images
- Upload your chosen image as a flat graphic.
- Change the box color to white (important so it doesn’t print the color, unless that is what you would like).
- Resize the image to fit the front of the box.
- Rotate if needed so it aligns with the panel.
- Center vertically and manually adjust placement.
- Make sure the image does not overlap any score lines.
- Select the image and the outer box piece.
- Click Flatten.
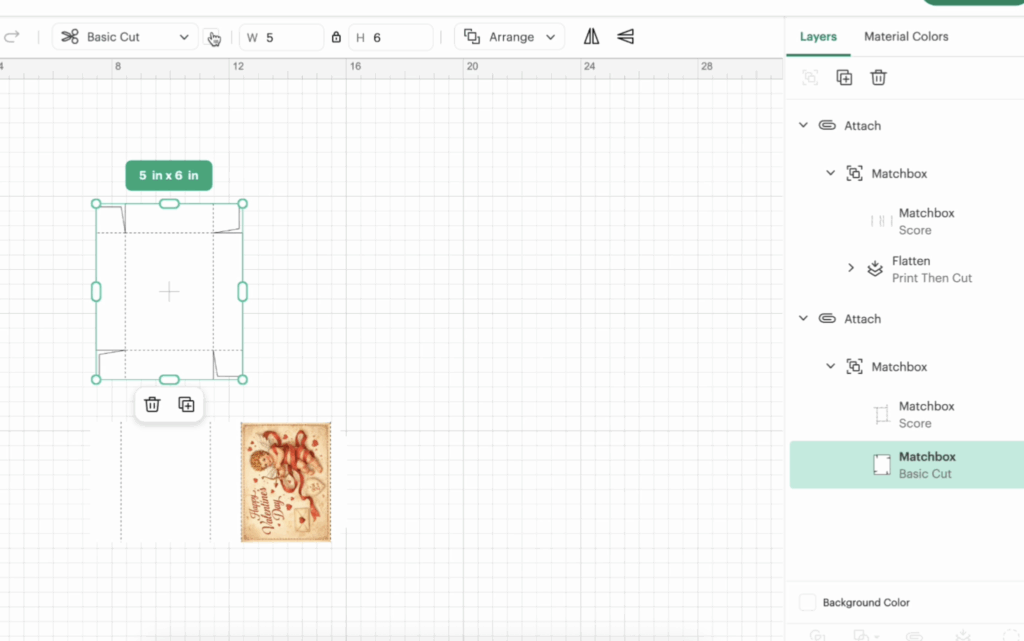
Once flattened, Cricut Design Space will recognize this as a Print Then Cut element. This is a great way to mix cardstock and printed designs for Valentine’s Day cards, treat boxes, or class party favors.
Cutting Your Matchbox Valentine Boxes
Click Make It and follow the prompts.
Material Settings
- Choose medium cardstock but this will depend on the thickness of your paper
- Use a scoring stylus or scoring wheel
- Switch tools as prompted
One thing I always recommend: pull the mat away from the paper instead of the paper from the mat. This keeps your pieces flat and avoids curling.
Step-by-Step Assembly Instructions
These assembly instructions are very beginner-friendly and go together quickly.
Assembling the Outer Sleeve
- Fold along all score lines.
- Form the rectangular sleeve.
- Apply glue to the small flap.
- Attach the flap to the inside of the box, not the outside.
Keeping glue flaps on the inside gives the box a clean, professional finish.
Assembling the Inner Drawer

- Fold on all scoring lines.
- Make sure the pattern faces outward.
- Apply craft glue or glue stick to the side pieces.
- Glue flaps inward so they’re hidden.
I personally prefer craft glue over a hot glue gun because it dries clear, but either works. Once all four sides are secure, your bottom piece drawer is complete.

Slide the drawer into the sleeve, and your box is done!
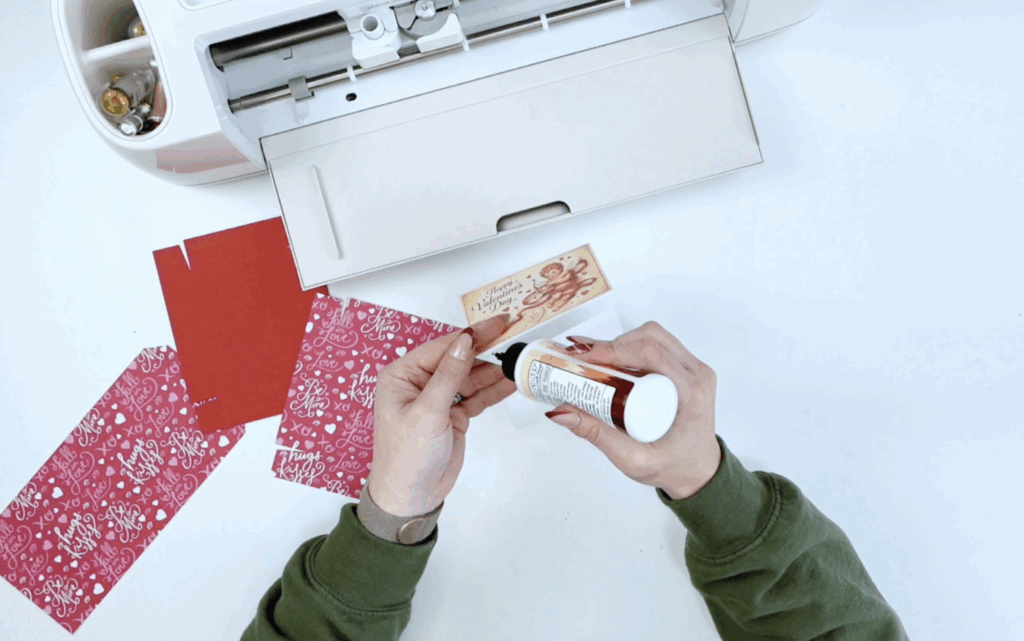
Customization Ideas for Valentine’s Day Boxes
This Valentine’s box SVG free template is incredibly versatile. Here are a few fun ways to customize it:
- Add names with vinyl or Cricut pens
- Use patterned cardstock for the inside drawer or the outside panel.
- Add ribbon or embellishments
- Resize for different small gifts
- Pair with Valentine’s Day cards
- Create a Valentine’s Day mailbox-style gift set – I have a free template for that too!
These boxes are a fun way to create meaningful, handmade gifts with a huge impact, especially for a class party or school exchange.
Commercial Use & Disclosure
This free SVG file includes limited small business commercial use. Full details are linked here.

Free Valentine Matchbox SVG Download (Community Vault)
This Valentine’s box SVG free design is available inside my Community Vault. To access the free download, you’ll need the Community Vault password, which is sent when you sign up for my email list. Please sign up below to recieve the password, allow 5-10 minutes for it to arrive to your inbox and make sure to check spam and promotions.
- Matchbox Template SVG: Download #209
- Vintage Valentine Images: Download #210
Learn how to download my free files here!!
This Valentine’s box SVG free matchbox template is one of those projects that checks all the boxes: it’s quick to make, beginner-friendly, and easy to customize for so many different occasions. Whether you’re putting together Valentine’s Day treats for a class party, packaging small gifts, or creating something handmade just because, these Valentine boxes are a great way to make simple supplies feel extra special.
What I love most about this design is how flexible it is. You can keep it simple with solid pieces of cardstock, dress it up with Print Then Cut vintage images, or personalize the front of the box with names, vinyl, or Cricut pens. No matter how you style it, the matchbox structure goes together fast, the score lines make assembly easy, and the finished box has a polished, professional look.
Need more Valentine’s Day projects and files? I have you covered here for your Valentine!!
Stay Crafty!


